Pages

Showing posts with label brownies. Show all posts

Friday, September 16, 2011

Espresso Cheesecake Brownies

I'm a fan of coffee and chocolate. I usually steer clear of coffee flavored desserts because there will always be people who just don't drink coffee so they refuse to even taste the dessert I worked so hard on. And that makes me sad. It's good, dammit! But on this occasion I knew I was heading to a party of coffee lovers!

Brownie and espresso cheescake layers

I find if I make the brownie portion first, it just gets thicker as it cools and then it's impossible to swirl with the cheesecake portion! So I recommend making the cheesecake portion first and popping it in the fridge while you make the brownies. :oD I made these in an 8 inch round cake pan. The recipe is originally made for a 9 inch square pan but I used most of the batter. And I think the round pan makes a really impressive presentation.

Also, Ghirardelli makes a dark chocolate espresso bar that they sell in supermarkets! If you can find it I highly recommend you use it, but you can use any dark chocolate really.

Espresso Cheesecake Brownies
Adapted from Life in a Peanut Shell

For the cheesecake

1 1/2 teaspoons instant espresso powder dissolved in 1 tablespoon boiling water (I use Starbucks VIA, awesome stuff, and handy when the power was out)
8 ounces cream cheese, at room temperature
2/3 cup sugar
1/2 teaspoon vanilla extract
2 large eggs
1/4 cup sour cream
1 tablespoon all-purpose flour

For the brownies


1/2 cup all purpose flour
1/4 teaspoon baking powder
pinch of salt
5 tablespoons unsalted butter, cut into cubes
4 ounces dark chocolate (around 60% cocoa0) (Note: The Ghirardelli bars I mentioned are 3.5 oz. I bought 2 and broke a little bit off the second bar for the brownies, then saved the rest for garnish...and to eat!)
1/3 cup sugar
2 large eggs
1/2 teaspoon vanilla extract

For the topping

1 1/4 cups sour cream
1/2 cups confectioners' sugar
  1. Preheat the oven to 350 and coat your pan with cooking spay.
Make the cheesecake
  1. Allow the espresso to cool to tepid.
  2. With a stand mixer fitted with the paddle, beat the cream cheese on medium until it's completely smooth.
  3. Add the sugar and continue to beat for 3 minutes more.
  4. Beat in the vanilla and espresso
  5. Add the eggs one at a time
  6. Reduce the speed to low and add the sour cream
  7. Slowly add the flour. Mixture should be very smooth.
  8. cffffffffffffffffffffffffffffffffffffffffffffffff (My rabbit Lillie added step 8 here by stomping on my lap top... I don't know what she's trying to say)
  9. Anyway, place the cheesecake batter in the fridge while you make the brownies
Make the brownies
  1. Whisk together the flour, baking powder and salt.
  2. Melt the butter and chocolate together over a double boiler with water simmering.
  3. Transfer to a stand mixer and add the eggs one at a time, beating after each addition.
  4. Beat in the vanilla.
  5. Gently stir in the dry ingredients just until they are combined, be careful not to over-mix.
Assemble!
  1. Pour about 3/4 of the brownie mixture into the prepared pan.
  2. Smooth it out, then pour the cheesecake layer over the top, taking care to make it even.
  3. Place spoonfuls of the rest of the brownie batter on top, and use a knife to swirl the dark and light batters together.
  4. Bake for around 30 minutes. The brownies should come away from the sides of the pan. The cheesecake will puff and turn lightly browned around the edges.
  5. Transfer the pan to a wire rack to cool.
  6. Once it reaches room temperature, refrigerate for at least 2 hours, until well chilled.
Make the topping

1 1/4 cups sour cream
1/2 cups confectioners' sugar
  1. Warm the sour cream and sugar in a small saucepan over very low heat.
  2. Stir constantly until the sugar is dissolved.
  3. Pour over the chilled brownies, then return them to the refrigerator and chill for at least another hour.
  4. To garnish with chocolate curls, let the chocolate set at room temperature (or under a light to warm up if it's very cold) and use a vegetable peeler to shave the edges off the chocolate
Espresso cheescake brownies

Espresso chocolate "curls"

Sunday, September 4, 2011

Salted Caramel Brownies (of Doom!)

Hello friends! I feel like I haven't blogged in awhile but I have an excuse! We lost our power due to hurricane Irene last Sunday, and it didn't come back until this past Friday night! But the good news is it's back. Losing power was the worst we had though, others were not so lucky and hopefully will continue to dry out and bounce back slowly but surely!

So now that power and internet are back, I can share my lovely salted caramel brownies with you! I seem to have a lot of advice to dispense for these. I also added my own notes in italics to the recipe instructions where I deviated from the original.

Salted caramel brownie

First, they're made with fancy schmancy fleur de sel. Which I purchased from (one of) my favorite store ever, Savory Spice Shop! But really...you can use any sea salt...it is mixed into the caramel, but it's also used as an edible garnish on top which is nice because it won't dissolve into the brownie. So don't go crazy looking for it, my advice is that it's not critical!

Also, if you have never made caramel before, READ THIS!!!! This was my first time making caramel from heating sugar and I totally smoked out my kitchen and burned the first batch to hell. That's why I refer to them as brownies of doom, because it was horrific! Unlike the fler de sel, this advice is critical!

The recipe I followed and others I've looked at advise to heat the sugar to a certain temperature using a candy thermometer. Ignore that! Use your eye to watch the color carefully! When sugar is light khaki TAKE IT OFF THE HEAT! It will continue to cook and darken QUICKLY. Let "settle" before pouring cream in it, because it will bubble up like crazy at that point! Also when pouring the cream, whisk like you've never whisked before. Make sure you set the pot somewhere stable and be EXTREMELY, SUPER careful of drips because you will get scalded badly. If it drips on your counter or stove, let it cool and harden, this dissolve it off. Please follow this advice and stay safe out there!

Salted Caramel Brownies
From Divine Baking

For the filling
1 cup sugar
2 tablespoons light corn syrup
1/4 cup water
1/2 cup heavy cream
1 teaspoon Fleur de Sel (or any coarse sea salt)
1/4 cup sour cream

For the brownies
1 1/4 cups all-purpose flour
1 teaspoon salt
2 tablespoons dark unsweetened cocoa powder
11 ounces quality dark chocolate (60 to 72%), coarsely chopped
1 cup unsalted butter, cut into 1-inch cubes
1 1/2 cups sugar
1/2 cup firmly packed light brown sugar
5 large eggs, at room temperature
2 teaspoons vanilla extract
1 1/2 teaspoons Fluer de Sel
1 teaspoon coarse sanding sugar (optional, for garnish)

Make the caramel of doom
  1. Combine the sugar and corn syrup with 1/4 cup of water in a medium saucepan, stirring carefully so as not to splash the sides of the pan.
  2. Cook over high heat until the mixture is the color of khaki or light amber.
    Lighter than this, but close:
    Caramel of doom
  3. Remove from the heat instantly and let the bubbling settle.
  4. Slowly add the cream while whisking
  5. Add the fleur de Sel.
  6. Whisk in the sour cream and set aside to cool.
Make the brownies
  1. Preheat oven to 350
  2. Butter or use cooking spray to coat the sides and bottom of a glass or light colored metal 9 x 13 inch pan.
  3. Line the bottom with a sheet of parchment paper, and butter or use cooking spray to coast the parchment.
  4. In a medium bowl, whisk together the flour, salt and cocoa powder and set aside
  5. Place the chocolate and butter in the bowl of the double boiler set over a pan of simmering water, and stir occasionally until the chocolate and butter are completely melted and combined.
    (Note: I do own a double boiler, but after melting the butter and chocolate, you will be adding the sugars, eggs, etc. So I set the bowl of my stand mixer over a bowl of water and melt the butter and chocolate directly in there. Set up looks like this. Then transfer the bowl to the mixer, instead of melting them in a separate pot and scraping into another bowl. I feel it saves me time and a dish to clean.) :oD

  6. Turn off the heat, but keep the bowl over the water of the double boiler, and add both sugars. Note: Whatever...at this point I put it on my mixer. Whisk until completely combined and remove the bowl from the pan. The mixture should be at room temperature at this point.
  7. Add three eggs to the chocolate mixture and whisk until just combined.
  8. Add the remaining two eggs and whisk until just combined.
  9. Add the vanilla and stir until just combined, be careful not to over-beat.
  10. Add the flour mixture to the chocolate mixture. And beat until there is a just a trace amount of the flour mixture visible.
  11. To assemble the brownie, pour half of the brownie mixture into the pan and smooth the top with a spatula.
  12. Drizzle about 3/4 cup of the caramel sauce over the brownie layer in a zigzag pattern, taking care to make sure the caramel does not come in contact with the edges of the pan or it will burn. Note: I found it impossible to keep the caramel from touching the edges, I used a glass pan, it didn't burn, it was fine, I don't know if this hold true for a metal pan though.
  13. Spread the caramel evenly across the brownie layer.
  14. In heaping spoonfuls, scoop the rest of the brownie batter over the caramel layer. Smooth the brownie batter gently to cover the caramel layer as best you can.
  15. Bake the brownies for 30 minutes, rotating the pan halfway through the baking time. Brownies are done when a toothpick inserted into the center comes out almost clean.
  16. Remove the brownies from the oven and sprinkle with an extra 1 1/2 teaspoons Fleur de Sel and 1 teaspoon coarse sugar.
Fluer de sel = fancy french sea salt...tastes like salt...

Salted caramel brownie

Monday, July 25, 2011

Mexican Cocoa Brownies

Hello all! I apologize for not having posted in awhile, I was on vacation for a weekend in Cabo San Lucas, Mexico!

And in honor of my Mexico vacation, I give you Mexican cocoa brownies!

Fudgey Mexican cocoa brownie

I didn't get the cocoa in Mexico though. I actually made these before I even left, I wanted to bake something easy and sweet, but special, so I used my Mexican cocoa from Savory Spice Shop! Mexican cocoa and chocolate is special because it's cocoa combined with almonds and cinnamon, very tasty. But if you can't find it in stores, I've found you a substitute! *Measure out the 1/2 cup plus 1 tablespoon unsweetened cocoa powder, and add 3/4 teaspoon ground cinnamon.

The recipe makes two 8 x 8 pans, or one 9 x 13 pan I'm sure, but since it's just Dave and I in the house I halved it and made one 8 x 8, and added some cinnamon extract for fun.

Mexican Cocoa Brownies
adapted from Savory Spice Shop

1/2 cup unsalted butter
1 cup sugar
1/2 cup brown sugar
1 1/2 tablespoon vegetable oil
1/3 cup light corn syrup
3 eggs
1/2 cup plus 1 tablespoon Mexican cocoa (or see substitution above*)
1 cup flour
1/4 teaspoon vanilla extract
1/8 teaspoon cinnamon extract (optional)
  1. Line and butter a 8 x 8 inch square brownie pan and preheat oven to 350 degrees.
  2. In a large mixing bowl, cream the butter
  3. Beast in sugars, oil and syrup until blended.
  4. Stir in eggs one at a time until blended.
  5. Stir in cocoa, flour and extract until blended.
  6. Spread evenly into the prepared pan and bake at 350 degrees for 40 minutes.
  7. Allow to cool in pan before cutting into bars!
Mexican cocoa brownie

Nearly 1/3 didn't even make it to morning

Wednesday, June 15, 2011

"The" Baked Brownie

Apparently this is supposed to be the ultimate brownie. Sounds good. I really decided to make it because I wanted something sweet for a Memorial Day barbecue and this recipe was for a 9 x 13 pan, and I had most of the ingredients on hand! It's pretty simple!

Memorial Day brownies

I followed the recipe from Divine Baking who adapted them from somewhere where it was re-posted, etc. etc. And apparently it won't be a success unless you follow the very specific instructions exactly, cross your "t"s and dot your "i"s. Well, mine were a success, and I admit I skipped some of the details I felt were extraneous.

So I'll be re-posting the recipe below including my own notes in italics.

"The" Baked Brownie

1 1/4 cups flour
1 teaspoon salt
2 tablespoons dark cocoa powder (I had some Mexican cocoa on hand)
11 ounces quality dark chocolate (60-72%), chopped coarsely
8 ounces butter (2 sticks), cut into 1 inch cubes
1 teaspoon instant espresso powder (I used Starbucks Via)
1 1/2 cups sugar
1/2 cup light brown sugar
5 large eggs, room temperature
2 teaspoons vanilla extract
  1. Preheat oven to 350 degrees.
  2. Butter the sides and bottom of a glass or light colored metal pan 9x13x2 pan.
    Or cooking spray works...
  3. In a medium bowl, whisk together the flour, the salt, and cocoa powder.
  4. Configure a large sized double boiler.
  5. Place the chocolate, the butter, and the instant espresso powder in the bowl of the double boiler and stir occasionally until the chocolate and butter are completely melted and combined.
  6. Turn off the heat, but keep the bowl over the water of the double boiler and add both sugars.
    So, my stove is electric, which means when it's shut off the burner doesn't really start to cool down for another few minutes. Plus the sugars would never fit in my double boiler, so I transferred the chocolate mixture to a stand mixer at this point
  7. Whisk the sugars until completely combined. Mixture should be room temperature.
  8. Add three eggs to the chocolate/butter mixture and whisk until just combined.
  9. Add the remaining eggs and whisk until just combined.
    Uh...just add the eggs! Add the vanilla while you're at it
  10. Add the vanilla and stir until combined.
  11. Do not over beat the batter at this stage or your brownies will be cakey.
  12. Sprinkle the flour/cocoa/salt mix over the chocolate.
  13. Using a spatula (DO NOT USE A WHISK) fold the dry into the wet until there is just a trace amount of the flour/cocoa mix visible.
    Eh, I slowly added the dry ingredients with the stand mixer on low and stopped just a touch before it was all mixed in.
  14. Pour the mixture into the pan and smooth the top with your spatula.
  15. Bake the brownies for 30 minutes (rotate the pan half-way through baking) and check to make sure the brownies are completely done by sticking a toothpick into the center of the pan (I would check the brownies about 20 minutes in, because mine were done soon after that).
    Mine were still pretty raw after 30, they took closer to 40.
  16. The brownies are done when the toothpick comes out with a few moist crumbs.
  17. Cool completely in pan on wire rack.
Perfect brownies?

Saturday, February 26, 2011

Cocoa Caramel Swirl Brownies - Recipe

I whipped these up the morning before a Superbowl party. I adapted them from the cocoa brownies recipe in Wild About Brownies which I chose simply because I had cocoa on hand. :o)

baked in caramel swirl goodness

They turned out sticky and fudgey, cutting was an adventure, I ended up removing them from the pan a cutting board and bringing the knife straight down to cut them since dragging the knife through just made them crumbley due to the caramel swirls. :o)

Cocoa Caramel Swirl Brownies
Adapted from Wild About Brownies

3/4 cup all-purpose flour
1/4 teaspoon baking powder
1/4 teaspoon salt
1 cup granulated sugar
2 eggs
1/4 cup vegetable oil
1/4 cup caramel liqueur (I used Baileys)
1/3 cup unsweetened cocoa
1 teaspoon vanilla extract
1/4 teaspoon almond extract (optional)
About 2 tablespoons caramel sauce
  1. Preheat oven to 350. Grease the bottom and sides of an 8 inch square baking pan. Line bottom with parchment paper, letting paper slightly hang over two edges (good for lifting brownies out to cut).
  2. In a small bowl combine flour, baking powder and salt.
  3. In another bowl mix together the sugar, eggs, oil and caramel liqueur with an electric mixer.
  4. Stir in the cocoa and extracts.
  5. Stir in the flour mixture until just combined.
  6. Pour the batter into the prepared pan and spread evenly. Distribute the two tablespoons of caramel sauce over top of the brownies and use a knife to draw in all sorts of fun swirls.
  7. Bake for 30 - 35 minutes or until a cake tester inserted into the brownie portion comes out almost clean.
  8. Cool in the pan on a wire rack then remove using parchment paper. Easiest to place on a large cutting board and use the knife to cut straight down to cut the brownies into squares.
  9. Store in an airtight container at room temp.

Sexy caramel swirls

Sunday, December 12, 2010

Thanksgiving Baking

I know it's December, and almost Christmas. House is decorated, cards have been sent, gifts are piling up to be wrapped and I've been gingerbreading.

But all that stuff has taken time and I baked some cool stuff for Thanksgiving that deserves a blog post! I short changed a lot of my fall baking treats that were pretty cool so I'm trying not to do that again!

So here's the last of the fall baking, keeping it short and sweet. :o)

1) Pumpkin brownie bites


I baked and pureed my own pumpkins this year (and I still have a freezer full of pumpkin puree). So I meant to bake these to bring to Dave's family that was our second stop on Thanksgiving but my bottom pan burned and I had to pry them out of the pan. :o( The top pan, however, was delicious.

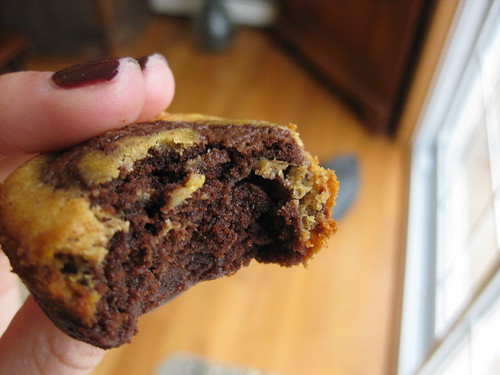
It's a fabulous chocolate brownie "swirled" with a pumpkin cheesecake. My recommendation if you're going to make them is to make the pumpkin portion first then the chocolate portion. My chocolate portion thickened as it cooled and made swirling difficult.

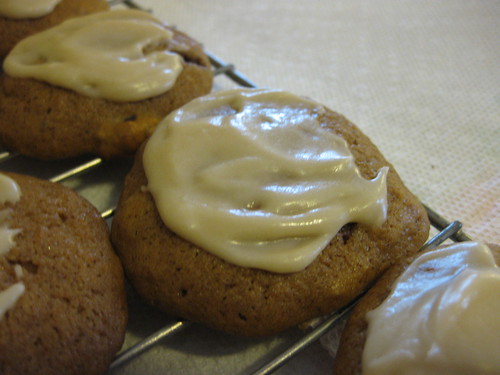
2) Pumpkin cookies withe maple icing


Seeing as I couldn't bring only 8 or so good pumpkin brownie bites for Thanksgiving, I got up early that morning and in addition to baking an apple pie, I baked these pumpkin maple cookies!

I did have maple extract on hand as the recipe calls for and I have to say this icing was orgasmic. If I ever make it again I'll try it with real maple syrup (we bring back a high grade from Maine every year), but the extract gives it some serious flavor. I had a ton left over though and couldn't bring myself to just get rid of it, so I put it in some tupperware and brought it to my mom's to set out at dessert for Thanksgiving. It has the potential to be to all foods what bacon has become to desserts. My uncle tried it on pie and I think my cousin put it over her ice cream.

Anyway, these cookies have a nice pumpkin flavor and also stayed nice and cakey. Love em.

3) Apple Cake


Once back from Maine I had some apples left over from my epic apple pie baking. So I baked up an apple cake from my Totally Tea Time cook book! I really love tea, and going to tea rooms, the whole tea experience. In fact I'd love to own a tea room, I think I'd be great at it, anyway... I got this book as a gift awhile back and thought I'd make some apple scones but this used up far more apples. ;o)

Came out pretty good, I thought I'd frost it with some swiss meringue apple butter frosting I had in the freezer but I don't think that's the point of apple cake and it was good without it anyway. :o)

That's it! That's all my fall baking blogged. On to the next adventure!

Wednesday, September 22, 2010

ginger chocolate brownies

Dave and I were going to a Sunday afternoon bbq with co-workers. I gave him a choice of thai tea cupcakes, tri-color cookies, and ginger brownies, and he picked ginger brownies with fresh ginger root. :oD

Ginger and chocolate seems to make so much sense and not a lot of sense at the same time. They seemed like they'd pair so well I wondered why I haven't seen more ginger and chocolate treats, so maybe it didn't make that much sense? But that can't be right, they must be amazing.


Before I baked these up I ended up throwing a little bit more ground ginger in it to make them more gingery but was afraid of putting too much. In the end Dave recommended more ginger as well. So more fresh grated ginger next time.

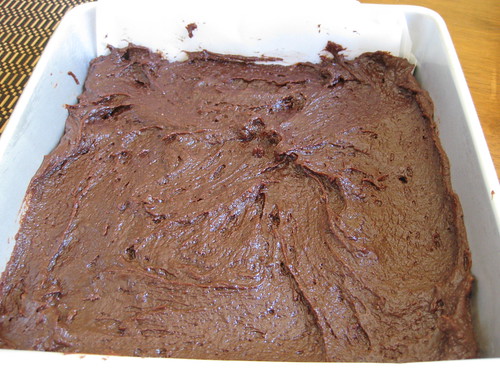
Here they are before they went in the oven.

And here they are after! Mine didn't get crackley on the top, but they still tasted good and were a success at the party! They're super chocolately and delicious and more are in baking adventures set on flickr!

Related Posts with Thumbnails