Pages

Showing posts with label fall. Show all posts

Saturday, December 3, 2011

Caramel Apple Cookies

Well, these cookies were easy to make and tasty. But I'm not sure they captured the essence of caramel apple. Maybe I needed a better toffee mix in? The recipe called for toffee bits and I used chopped butterscotch morsels...hmm...

Caramel apple cookie

Caramel Apple Cookies
Adapted from Bakers Royale

1 3/4 cup unbleached all purpose flour
1/2 teaspoon baking soda
1 3/4 sticks butter
1/2 cup granulated sugar
1/2 cup packed dark brown sugar
1 teaspoon salt
1 teaspoon vanilla extract
1 large egg
1 large egg yolk
1 cup diced apples (4 oz.)
3/4 cup chopped salted roasted almonds
1/2 cup toffee bits (chopped butterscotch chips?)
  1. Preheat oven to 350 F and line cookie sheets with parchment paper (not essential, but it helps)
  2. Whisk flour and baking soda together and set aside.
  3. Heat 10 tablespoons of butter in a skillet over medium heat until melted about 2 minutes. Continue stirring for another 1-3 minutes until brown and there is a nutty aroma. Remove from heat. Pour heated butter through a sieve into a heat proof bowl. Stir in remaining butter until completely melted.
  4. Add  both sugars, salt and vanilla to bowl with butter and whisk until fully combined. 
  5. Add egg and egg yolk, whisk until mixture is smooth and no sugar lumps remains.
  6. Let mixture stand for 3 minutes then whisk for another 30 seconds.
  7. Repeat step four 2 more times until mixture is thick and shiny. The butter will start to firm up as it cools and come more to resemble cookie batter
  8. Stir in flour mixture until combined. 
  9. Stir in apples, roasted almonds and toffee bits combined.
  10. Use an ice cream scoop to form cookies. Place dough 2 inches apart on cookie sheet.
  11. Bake cookies one tray at a time, rotating cookie sheet halfway through baking. Bake until cookies are golden brown and still puffy. Approximately 10-14 minutes.
  12. Cool on cookie sheets set on wire rack before removing to wire rack to cool completely
  Caramel apple cookies

Thursday, November 17, 2011

Apple Almond Streusel Mini Muffins

I made these for a Halloween treat for my office. They disappeared from the kitchen almost immediately. Here we have apple almond streusel mini muffins!

Mini almond apple streusel muffin

The original recipe calls for Amaretto which usually I'm all for, but I didn't have any on hand. Someone must have drank it all...hmm... I've noted the substitution below! Also I suggest increasing the streusel topping, I wish I'd had more, so I've bumped it up in the recipe below. It's hard to have too much crumb topping. :o)

Apple Almond Streusel Mini Muffins
Adapted from ButterYum

For the streusel topping

3 tablespoons all-purpose flour
3 tablespoons brown sugar
1/4 teaspoon plus a pinch extra ground cinnamon
3 tablespoons sliced or finely chopped almonds
3 tablespoons butter, chilled

For the muffins

1 1/2 cups all-purpose flour
1/2 teaspoon baking powder
1/4 teaspoon salt
1/4 teaspoon baking soda
3/4 cup sugar
2 ounces cream cheese
4 tablespoons unsalted butter, softened
1/4 - 1/2 teaspoon almond extract OR 2 tablespoons amaretto (almond liqueur)
1 teaspoon vanilla extract
1 large egg
1/2 cup sour cream
1/4 cup milk
3/4 cup finely chopped apple apples
1 tablespoon all-purpose flour
Make the streusel topping
  1. In a small bowl, combine flour, brown sugar, cinnamon and almonds.
  2. Cut in the butter using a pastry cutter, fork or by hand until the mixture resembles coarse crumbs.
  3. Place in fridge until ready to use.

Make the muffins
  1.  Preheat to 350F and line muffin pan with paper liners. 
  2. In a small bowl, whisk together the flour, baking powder, salt, and baking soda and set aside.
  3. In a second small bowl, combine apples and 1 tablespoon flour and also set aside for later.
  4. In a third small bowl, combine sour cream and milk and set aside for later.
  5. In a large bowl, cream together the cream cheese and butter.
  6. Add the sugar and beat until fluffy. 
  7. Add almond extract (or Amaretto), vanilla extract, and egg and beat until well blended. 
  8. With the mixer on slow, add 1/3 of the flour mixture, then 1/2 of the sour cream mixture, the another 1/3 of the flour flour, then the remaining 1/2 sour cream, and finally the remaining 1/3 flour mixture. 
  9. Stir in apples and spoon into prepared pan.
  10. Go get your streusel topping and sprinkle it generously on top of the unbaked muffins.
  11. Bake for 10 - 12 minutes or until a toothpick inserted in the center comes out clean.
  12. Cool in pan on wire rack for 15 minutes, then remove from pan and cool completely.
Office party mini muffins

Streusel topping

Tuesday, October 25, 2011

Mini Pumpkin Spice Latte Cupcakes

These are quite possibly one of my favorite cupcakes I've ever made. Ever. You can taste both the pumpkin and the coffee. I love the whipped cream frosting and the vanilla bean caramel is super impressive and delicious. These cupcakes look great and they taste incredible.

Mini pumpkin spice latte cupcake 


Sunday, October 23, 2011

Pumpkin Brownie Bites

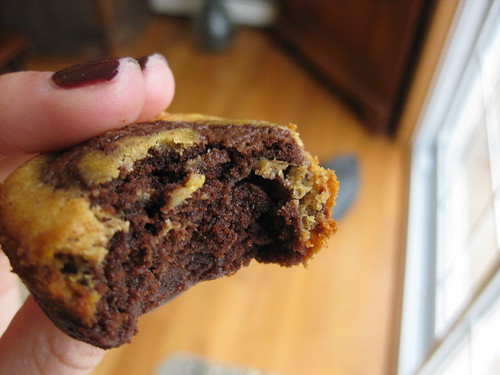
I tried to make these last year, and even though I messed them up and they burnt to the pan, the salvageable parts were still good! So I thought they deserved a second try.

Pumpkin brownie bites 

This year I made the pumpkin cheesecake batter first, then the brownie batter. Since as the brownie batter cools, it gets thicker and then harder to swirl. It still only turned out okay. Am I the only one with this problem? My espresso cheesecake brownies also advised to make the brownie portion first, how does any swirling get accomplished this way?

Anyway, I also baked them in wrappers, as I had issues with the outsides of them burning last year. Gggrrrrr... Also I had a ton of cheesecake batter left over, both this time and last. I think they looked pretty evenly split, but who knows, I just made a bunch of mini pumpkin cheesecakes, also delicious.

Friday, October 14, 2011

Brown Sugar Maple Glazed Baked Mini Donuts

I love brown sugar. When I can, I've been sneaking it into things to make them extra tasty, like my brown sugar snickerdoodles. I did the same here for these brown sugar, maple glazed baked mini donuts! I brought them to a brunch and they went over very well!

Maple glaze on donut

This made about 30 mini donuts. Also the glaze came out a little thin and I had to re-dip them. Although it's possible they could not have been cooled all the way, so just in case, don't add all the milk to the glaze at once! Add it little by little to make sure you get the right consistency!

Also I always use a piping bag to fill the pan with mini donuts. A spoon just won't cut it, so if you don't have real piping bags do the trick with a zip lock bag instead. I pipe in a somewhat thick "layer" of batter into the bottom of each cavity. If filled too much they won't look like donuts after they rise!


Brown Sugar Maple Glazed Baked Mini Donuts
Adapted from Glorious Treats

For the donuts
1 1/4 cups all purpose flour
1/4 cup granulated sugar
1/4 cup brown sugar
1 1/4 teaspoons baking powder
1/2 teaspoon salt
1/2 cup buttermilk
1 egg
1 1/2 Tablespoons butter, melted
  1. Preheat oven to 425 F.  Spray mini doughnut pan with nonstick cooking spray
  2. In a large mixing bowl, sift together flour, sugar, baking powder and salt.
  3. Add buttermilk, egg, and butter and stir until just combined.
  4. Pipe the batter into your donut pan with a piping bag or zip lock bag with the end snipped off.
  5. Bake 4-6 minutes or until the top of the doughnuts spring back when touched. 
  6. Cool in pan 1-2 minutes, then transfer to a cooling rack. 
For the maple glaze

1 cup powdered sugar
2 Tablespoons milk
1 to 1 1/2 teaspoons pure maple extract
  1. In a small bowl, stir together sugar, milk and extract until sugar is completely dissolved.  
  2. Make sure donuts are completely cooled, then use glaze immediately to dip the donuts.
  3. Place on baking sheet until glaze is set
Maple glazed mini baked donuts

Sunday, December 12, 2010

Thanksgiving Baking

I know it's December, and almost Christmas. House is decorated, cards have been sent, gifts are piling up to be wrapped and I've been gingerbreading.

But all that stuff has taken time and I baked some cool stuff for Thanksgiving that deserves a blog post! I short changed a lot of my fall baking treats that were pretty cool so I'm trying not to do that again!

So here's the last of the fall baking, keeping it short and sweet. :o)

1) Pumpkin brownie bites


I baked and pureed my own pumpkins this year (and I still have a freezer full of pumpkin puree). So I meant to bake these to bring to Dave's family that was our second stop on Thanksgiving but my bottom pan burned and I had to pry them out of the pan. :o( The top pan, however, was delicious.

It's a fabulous chocolate brownie "swirled" with a pumpkin cheesecake. My recommendation if you're going to make them is to make the pumpkin portion first then the chocolate portion. My chocolate portion thickened as it cooled and made swirling difficult.

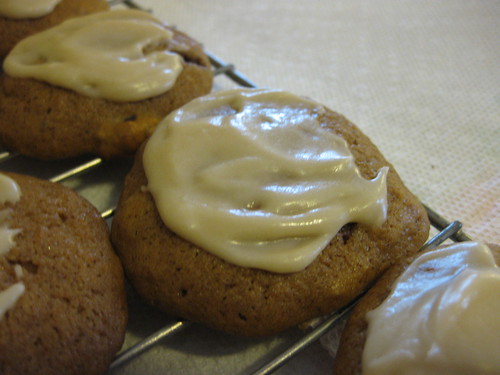
2) Pumpkin cookies withe maple icing


Seeing as I couldn't bring only 8 or so good pumpkin brownie bites for Thanksgiving, I got up early that morning and in addition to baking an apple pie, I baked these pumpkin maple cookies!

I did have maple extract on hand as the recipe calls for and I have to say this icing was orgasmic. If I ever make it again I'll try it with real maple syrup (we bring back a high grade from Maine every year), but the extract gives it some serious flavor. I had a ton left over though and couldn't bring myself to just get rid of it, so I put it in some tupperware and brought it to my mom's to set out at dessert for Thanksgiving. It has the potential to be to all foods what bacon has become to desserts. My uncle tried it on pie and I think my cousin put it over her ice cream.

Anyway, these cookies have a nice pumpkin flavor and also stayed nice and cakey. Love em.

3) Apple Cake


Once back from Maine I had some apples left over from my epic apple pie baking. So I baked up an apple cake from my Totally Tea Time cook book! I really love tea, and going to tea rooms, the whole tea experience. In fact I'd love to own a tea room, I think I'd be great at it, anyway... I got this book as a gift awhile back and thought I'd make some apple scones but this used up far more apples. ;o)

Came out pretty good, I thought I'd frost it with some swiss meringue apple butter frosting I had in the freezer but I don't think that's the point of apple cake and it was good without it anyway. :o)

That's it! That's all my fall baking blogged. On to the next adventure!

The Apple Pie Post

The holidays are busy, cut me some slack... See the flickr page for Christmas photos until the blog catches up with the holiday baking and crafting! There are new photos of my epic gingerbread adventure and crafty holiday cards!

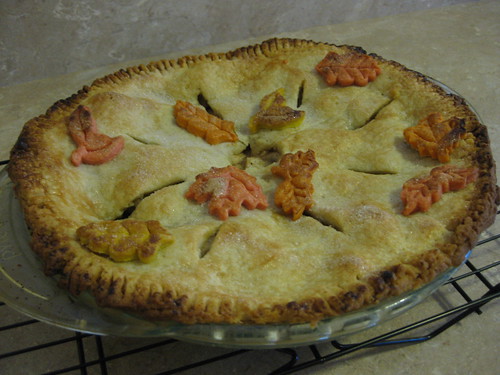
But this post is about apple pie! I made two apple pies this Thanksgiving. One for my fam and one we traveled to Maine with for Thanksgiving with Dave's fam. Here's the one that came to Thanksgiving at my mom's house with us.


I made my first unsupervised apple pie this year (featured in this post of fall baking) and it turned out so well, my mom asked me to handle the apple pie for Thanksgiving. I really was very pleased with it. I got the recipe from a book my mom photo copied for me, Aunt Jenny's Pies Husbands Like.

It's all about how to hook a man with pie, I think it was published in the 50s? So it has to be good. ;o) And the pie did go over well with everyone who tried it! It makes a big deal about the "water whip" method for pie crust that involves pouring boiling water over something called Spry...the same thing as shortening...and then adding the flour etc. I used butter flavored crisco and it did turn out lovely.

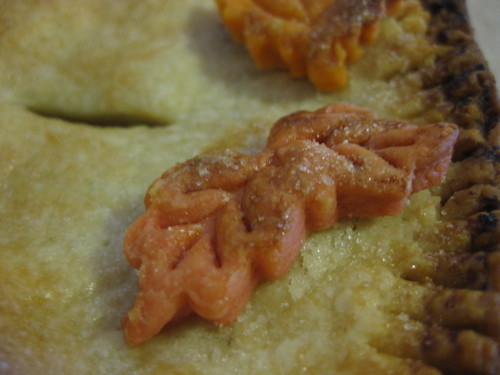
I also used my William Sonoma fall pie crust cutters!


Cute! I colored the dough with different color food coloring and cut the leaves out of that. I'm such a nerd. Here's pie 2 that went all the way to Maine. I came home after Thanksgiving and made this that night (hence the bad lighting) since we were leaving the next morning, so glad I had something to bring though, and again everyone seemed to enjoy it. :o)


My crust got a little burnt although I covered it with foil towards the end. I hear there are pie crust protectors that take care of this, but I have yet to see one.

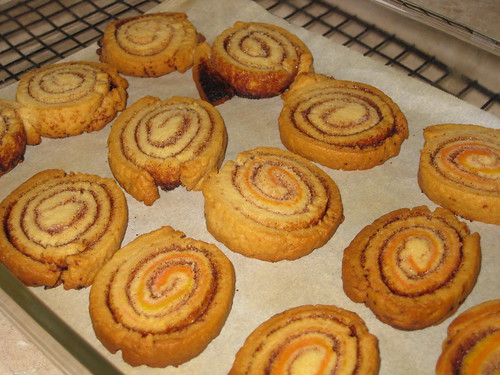
I had some extra pie crust (I had to double Aunt Jenny's recipe for my giant pie dish) so I made some cinnamon and sugar pie crust swirl cookies. My mom and grandma always made these when I was younger with left over pie dough. We snacked on them in the car on the way up to Maine. :o)

Saturday, November 20, 2010

Fall baking round up

work has me stressed out, so haven't been keeping up with my little blogger or much baking/crafting for that matter. Flickr has been updated thought!

Here's some cool photos from the season!


Pumpkin muffins!


Apple cider mini donuts! Yes! I got a mini donut pan! <3
My first apple pie all by my big self. With apples we picked from the orchard.


Sexy apple pie slice with homemade ginger ice cream, without and ice cream maker. Still a success! Doesn't go as well with the apple pie as I thought but it's tasty. :oD


Homemade apple butter, would of been great except don't use black pepper in your all spice substitute, worst idea ever.


Vanilla and apple butter swiss meringue buttercream macaron. That's cinnamon on top, did it taste like apple cinnamon? No...just sugar. Still looking for a decent macaron recipe, baking instructions are all wrong for the ones I tried so far!


Ghost shaped Count Chocula cereal treats for a halloween party. They were awesome.

Saturday, October 30, 2010

happy halloweekend!

Omg! A crochet post!


Finally made some critters from my Creepy Cute Crochet book! And here they are for Halloweekend!

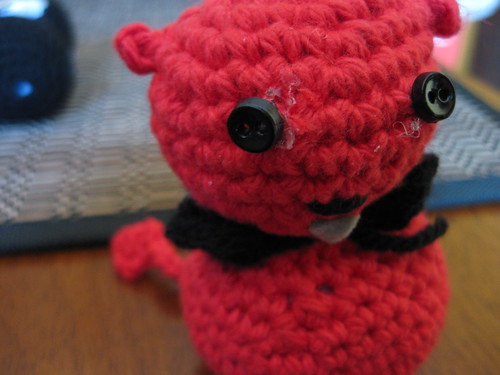
Devil (pardon the hot glue button eyes)


I heart my creepy cute button eyes, btw, very Coraline! I think I'll try to make a creepy cute style Coraline.

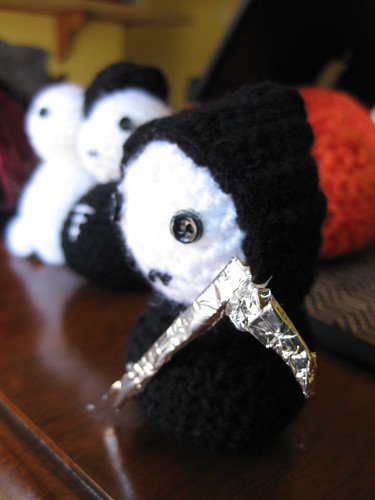
Reaper (and more Reaper here)


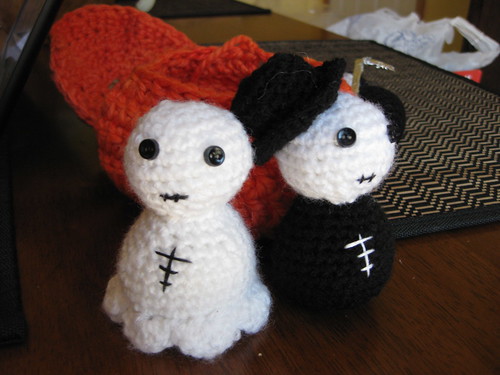
Skeleton bride and groom. She's missing a veil, she's not a "blushing" bride I guess. haha. If I find some tool for an appropriate price that I don't have to buy 50 pieces of, or come across something to substitute, I'll finish her up. Until then...Creepy Cute Skeleton Bride and Groom! I LOVE his top hat, btw.


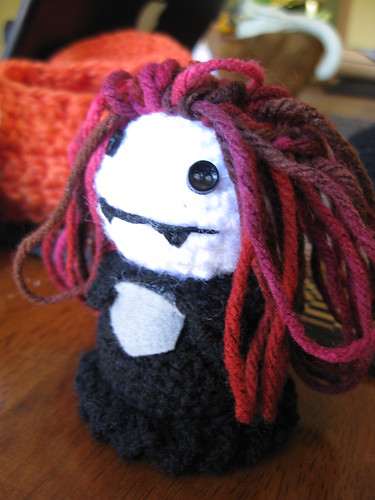
Vampire Queen! Vampire queen is definitely the coolest creepy cute character I've made. I envy her long red hair. The hair is tricky, but I think this one came out okay for a first try. My first try fell apart, I couldn't even untangle it. But she's definitely awesome.


So what did I think of the patterns in this book? She has a great blog with a lot of tutorials, etc., but I have to say I found a lot of the instructions overly complicated for some things. Like the heads are made in rounds and decreased randomly all over the place, why? It's apparently because the head is shaped slightly oblong...but could you not do that in spirals? And who can tell anyway. Also for things like the hems of the skirts on the bride and vampire queen, it sounds like you're supposed to like double back and crochet in the stitches you just made, but I couldn't figure out how to get there without turning or something, and then I'd be crocheting in the wrong direction...whatever!

My advice to anyone following the patterns in this book is definitely take the time to make all the little details! For example I had no idea vampire queen had a collar, because who can tell from the picture and I was eager to finish her! But make it, it looks cute in real life. :o) But don't loose sleep over following the stitches exactly as they're written if you're having trouble, just make it how it looks good or works for you and move on! And stitch the faces before you fill the head, hello...

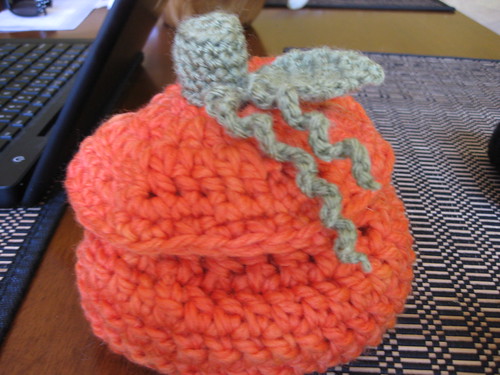
And last, my characters needed a vehicle in which to reside, since I just stuffed them with fiberfill and no one really stands up properly without some effort. So I made the great pumpkin bowl!


Loosely based on a pattern I found on Ravelry somewhere, I improvised most of the lid and all of the details like the stem, leaf, and vines. I started a second larger one but he'll become a harvest pumpkin, and not so much a halloween pumpkin. :o)


Please visit my flickr page for more halloween crochetedness!

Happy halloween kids!

Friday, October 22, 2010

my first french macarons: pumpkin with cinnamon buttercream filling

I love mini desserts. I haven't known about french macarons for long but they're so damn cute I had to learn how to make them. in googling some recipes I saw another blogger mention this book, I Love Macarons by Hisako Ogita which is apparently the macaron bible. Although I have a wishpot which is mostly books, I've sort of sworn off buying baking books or magazines, since there's ssssooooooooo many recipes online. But since my new obsession I decided to stop by Barnes and Noble to see if they had any macaron-ing books, and it was there!

I actually brought it home and read it. Like from cover to cover. I read a review on it later which said something about it originally being published in Japanese? Then translated...this was clearly translated. :o)

Anyway, on to the macarons!


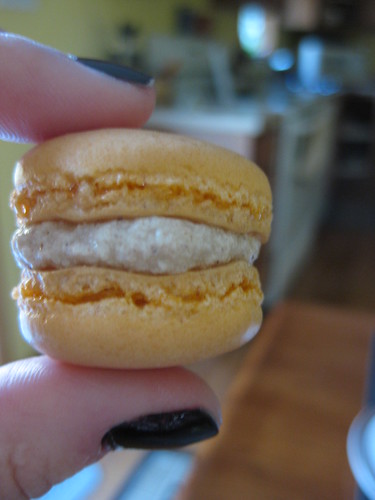
I am pretty impressed they worked the first time around! It was not without incident though. In the book, she describes this method for making butter cream where you make syrup (I guess) by microwaving the hell out of sugar and water for 4 minutes!? This is crazy, I actually did it and burned the hell out of the sugar, surprise, and thought my measuring cup was not going to be salvaged. It was, but that's just a bad idea.

I stuck a bunch of sticky notes all over the pages as well, here are what some of them said, in case you're a first time macaron maker as well:
  1. Seriously...just sift it (she says sift the almond meal and powdered sugar twice, i half assedly did it once...but it makes it much lighter and fluffier...so just sift it, once should do it...)
  2. Cut the damn parchment so it's flat, otherwise macarons may run when piped
  3. Don't pipe onto the same side as the circles are drawn on, it comes off on the macron, oops. Either flip parchment over or make a template on a new piece of paper that you remove after piping.
  4. When getting ready to stir 15 or 20 (or whatever gets the job done, hello) times, add the food coloring at this point
  5. When piping, don't swirl. pipe straight down until it spreads out and fills the circle
  6. Really, make sure the oven racks are in the center, my bottom rack burned. And check em! Mine baked way faster than 15 minutes
Those are my macaron gems of wisdom for you.


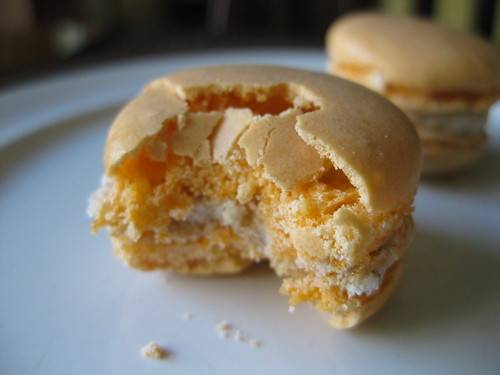
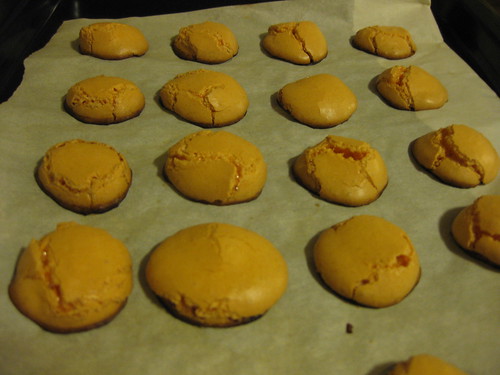
But beware when good macarons go bad. Here's what happened to mine that were on the bottom rack and piped by swirling, it's hard to look at...


Yikes! Sad... this one is better. :o) They even baked up with the little "foot," without which they can't be called macarons apparently. They're (by "they" I guess I mean the French?) referring to the little crinkley baked up looking part at the bottom of the macaron.


Oh, by the way, to get the pumpkin flavor I used two teaspoons of pureed pumpkin added to the meringue. I have many many bags of pumpkin puree, as it is also the first year I've pureed my own pumpkins and Dave bought me 3. :o) We'll be having pumpkin treats until into the new year I think. :o)

Also here is the recipe I used for the cinnamon buttercream. Good, but super sweet, maybe too sweet? I made a note to try with less sugar next time. Dave confirmed the macrons over all had a nice pumpkin pie taste, so for my first time these were certainly a success. I've decided this winter will be the year of the macaron, so I have more macaron plans to come.

One more sexy macaron picture and the rest are on flickr.

Related Posts with Thumbnails