Pages

Showing posts with label vanilla. Show all posts

Saturday, November 5, 2011

Lemon Chiffon Layer Cupcakes

This is a repost of a recipe from my other, short-lived blog. I've decided to focus on masquerading domesticity here, so now it will be a one-stop-shop for all my baking cleverness! So here you go!

These are lemon chiffon cupcakes, with a layer of lemon curd in the middle and topped with vanilla glaze and a homemade candied lemon peel!

Lemon love!

Lemon chiffon layer cupcake

So they weren't perfect! I'd never made chiffon cake before and it wasn't that difficult. But I wasn't really sure what to expect when I baked it into a cupcake. First I knew I wanted to slice them in the middle so I could add the layer of lemon curd, so I baked them without wrappers which is ALWAYS a headache! Never have I ever baked a cupcake or muffin where I didn't murder at least 3 before they came out of the pan when they had no wrappers.

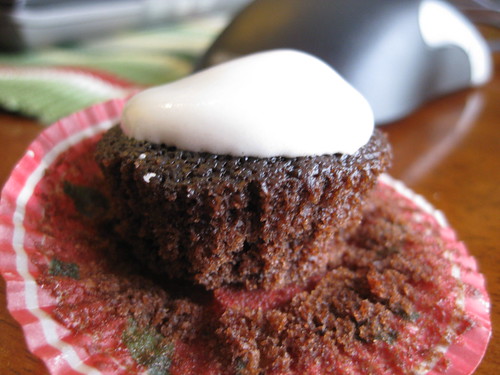
Also I expected they would behave a bit more like an angel food cake which creeps up the side of the pan then keeps going. As you can see here, they didn't do that.

And, my vanilla glaze recipe was wrong wrong wrong, so I ended up adding too much milk. I adjusted the recipe below though so you can make a proper vanilla glaze.

Candying the lemon peel was fun though, if not a little stressful! If you're going to take on all parts of this cupcake, I suggest making the candy lemon peel first, then the lemon curd, then the cupcakes and finally the glaze.


Thursday, May 19, 2011

Lemon Chiffon Layer Cupcake on Can It Cupcake?

I attempted to see if lemon chiffon cake could work out as a cupcake!

These are lemon chiffon cupcakes with a layer of lemon curd topped with vanilla glaze and a homemade candied lemon peel!

Please check them out at Can It Cupcake?!

Mother's day lemon chiffon cupcakes

Lemon chiffon layer cupcake

Vanilla glaze and candied lemon peel

Thursday, April 28, 2011

Easter Baking Part 2: Vanilla Bean Lavender Cupcakes

To accompany my Cadbury egg cupcakes, I baked up these white velvet vanilla bean cupcakes topped with lavender cream and a homemade chocolate covered marshmallow bunny!

White velvet vanilla bean lavender cupcake

They were 4 days in the making! Thursday I made the marshmallows. Friday I coated them in chocolate. Saturday I baked the cupcakes, and on Sunday I finished the lavender cream and assembled for Easter dessert! Not that you have to take 4 days to make them, but the lavender needs to steep for 24 hours and the marshmallows have to set out over night, so it's a process!

In case you're wondering what lavender cream tastes like...it tastes pretty much just like it smells (in my opinion, anyway). Which is good news if you like the scent of lavender! The taste is very mild and you can smell the lavender in the cream, but it is something different! My family are always willing taste testers in my baking adventures, and I'll certainly make the cupcake again! But if I were to make these for a crowd, I'd probably also offer a regular or vanilla whipped cream cupcake as an option as well. A little something for everyone!

For now I'll just link to the marshmallow recipe here. I have more marshmallow creations to share that I'll wrap up in another post! Until then, on to the cupcakes! Please be sure to read the full recipe first, since the lavender cream has to be prepared a day ahead! Also please note the whipped lavender cream is pretty delicate and will start to melt if out of the fridge for too long. Keep your travel and serving plans in mind. ;o)

Vanilla Bean Lavender Cupcakes

Yields about 24 regular sized cupcakes

For white velvet vanilla bean cupcakes
Adapted from Java Cupcakes

1 1/4 cup milk (divided)
1/4 cup sour cream
1/2 teaspoon pure vanilla
1 vanilla bean
1 1/2 sticks unsalted butter
1 1/2 cups sugar
4 large egg whites
3 cups sifted cake flour (if you can't find cake flour, substitute 2 1/4 all purpose flour plus 6 tablespoons cornstarch sifted together, but try to find the cake flour! It comes in a box!)
1 tablespoon plus 1 teaspoon baking powder
1/2 teaspoon salt
  1. Preheat oven to 375 and line cupcake pans with liners.
  2. Put 1 cup of the milk in a small sauce pan and set on medium heat.
  3. Slice the vanilla bean down the center and scrape out as many seeds as you can and add to the cream. Then, add the whole vanilla bean pod to the cream.
  4. Add the sour cream and vanilla extract to the sauce pan
  5. Continue to cook until the milk starts to steam and bubbles begin to form around the outer edge of the milk, whisking occasionally.
  6. Remove from heat immediately and let cool for 5-10 minutes.
  7. Remove the vanilla bean pod from the sauce pan and discard.
  8. In a large bowl, combine cake flour, baking powder and salt whisk together.
  9. In the bowl of an electric mixer cream the butter and sugar together until light and fluffy.
  10. Add the eggs and mix on high just until they start to whip up like frosting.
  11. Add 1/3 of the flour mixture on low and continue mixing to combine. Add half the vanilla cream, then another 1/3 flour mixture, then the second half of the cream, and finally the last 1/3 of the flour mixture. Be careful not to over mix.
  12. Add the last 1/4 cup of milk and mix just until combined.
  13. Fill each cupcake liner about 2/3 full.
  14. Bake 15-18 minutes.
  15. Let the cupcakes cool in the pan for 5-10 minutes before removing to a wire wrack to cool completely. They should be 100% cool before you try to top them with the lavender cream!
For the lavender cream

2 cups heavy cream (whipping cream)
5 tablespoons dried lavender
2 tablespoons sugar
Purple/blue food coloring (optional)
  1. Pour the cream into a bowl or measuring cup and whisk in the dried lavender.
  2. Leave it to steep for at least 24 hours in the fridge
  3. When ready, strain the lavender out of the cream and add the cream to a metal bowl (it will whip up better if it stays cold)
  4. Whisk in the food coloring if desired - if you choose not to use food coloring, the cream won't be pure white, but it won't really be lavender either :o)
  5. Using the whisk attachment or a hand mixer, start to whip the cream on high.
  6. It will start to form bubbles, then start to look foamy, then become smoother and start to increase in size.
  7. One it has passed the foamy stage, keep whipping on high and slowly add the sugar
  8. Keep whipping until stiff peaks are just about formed then STOP! You don't want to over whip the cream since it will start to turn to butter, that would be sad.
  9. Top the cupcakes with a dollop of cream and serve immediately, or pop em in the fridge til ready! (I also considered keeping the cream in the metal bowl and bringing it with me to assemble there, but it was just too many things to pack up!)
Happy lavendering!

White velvet vanilla bean lavender cupcake

Easter cupcakes

Friday, April 1, 2011

Week Night Cherry Almond Macarons

Macaron success! I've made French macarons with varying degrees of success, and I think this time may have been the most successful so far. Around the holidays I bought Martha Stewart's holiday cookie magazine in line at the grocery store, specifically for the macaron recipe, since the others I'd tried so far had mostly let me down. :o(

Lucky for you her recipe is also on her website, so I'll share it with you here. :o) Plus a recipe I made for cherry almond buttercream. Yum.

One of these things is not like the others

In the past, I went out and bought almond flour. But having been burned by my last 3 batches, I didn't want to put the time or money into another shopping trip, so I ground up some slivered almonds in my blender, which is why you can see a bit of the almond skins here. Also...shame on me...I didn't sift my ground almonds and sugar. Shame! All they do it get stuck in my flour sifter and make it impossible to clean! Plus I could only grind the almonds so fine before they would start turning to almond butter instead. So I just whisked the powdered sugar and almonds together really well and went with that.

Before you go ahead with the recipe, I should note that while this was my best attempt, it wasn't perfect. I read somewhere that you should only put one tray of macrons in the oven at once (some say it doesn't matter, and maybe it didn't this time), so that is what I did. The first batch came out perfect! Look at those sexy macaron feet! (The little ruffle that pops up at the bottom.)

The good looking cherry almond macarons

But the second and third batches turned into crazy, topsy-turvy, Dr. Suess macarons. Yikes!

They still taste good...

OMG! My best guess is that perhaps the batter dried out slightly in the piping bag, then in addition I let them dry too long after getting piped on to the tray, and instead of rising, one side or the other stuck? Maybe? Also I misread the instructions for baking about heating the oven for 5 min to 375 between each batch before putting in the next tray. Instead I raised it to 375 each time and made sure it was 375, then lowered to 325, waited 5 min, then put a new tray in. Those are instructions used below since as I said, the first batch was lovely! Either way, no matter how they looked they still tasted good and weren't a cracked, burned mess like some others. So sad.

So keeping that in mind, here goes the recipe!

Cherry Almond Macarons

Vanilla Macaron Shells
Adapted from Martha Stewart

1 cup confectioners' sugar
3/4 cup almond flour (or finely ground almonds)
2 large egg whites
Pinch of cream of tartar
1/4 cup granulated sugar
1/2 teaspoon vanilla extract
  1. Pulse confectioners' sugar and almond flour in a food processor until combined. Sift mixture 2 times. (Shame on me, I didn't sift, just whisked together)
  2. Preheat oven to 375 degrees.
  3. Whisk whites with a mixer on medium speed until foamy. Add cream of tartar, and whisk until soft peaks form. Slowly add in the sugar.
  4. Increase speed to high and after a few moments add the vanilla extract. Continue whisking until stiff peaks form.
  5. Sift confectioners' sugar mixture over whites, and fold until mixture drips slowly, ribbon-like, from the spoon. Don't overwork.
  6. Transfer batter to a pastry bag fitted with a 1/2-inch plain round tip, and pipe 3/4-inch rounds 1 inch apart on parchment-lined baking sheets, dragging pastry tip to the side of rounds rather than forming peaks.
  7. Tap bottom of each sheet on work surface to release trapped air.
  8. Let stand at room temperature for 15 minutes or until tops are dry to the touch.
  9. Reduce oven temperature to 325 degrees 5 minutes before putting the macrons in the oven.
  10. Bake 1 sheet at a time, rotating halfway through, until macarons are crisp and firm, about 10 minutes.
  11. After each batch, increase oven temperature to 375 degrees then reduce to 325 degrees again 5 minutes before putting in a new tray.
  12. Let macarons cool on sheets for 2 to 3 minutes, then transfer to a wire rack. (If macaroons stick, spray water underneath parchment on hot sheet. The steam will help release macaroons.)
  13. Prepare filling below, and once completely cooled, pipe a bit of frosting onto one macaron shell then sandwich with a second shell.
  14. Store in fridge in an air tight container

Cherry Almond Buttercream Frosting


1 6 oz jar maraschino cherries (Approx. 2 1/2 tablespoons pureed)
Approx. 1 tablespoon milk (more or less as needed)
1/2 teaspoon almond extract
1 package powdered sugar (16 ounces)
1/2 cup butter, softened (1 stick)
  1. Drain cherries and reserve juice.
  2. Puree cherries in a blender.
  3. Cream butter and slowly add confectioners sugar
  4. Add pureed maraschino and almond extract
  5. Add reserved juice from cherries and milk alternately to achieve desired texture.

The good cherry almond macarons

Friday, February 11, 2011

Frozen Treats

I know it's February and it's been 1 degree out (literally...), but Dave got me an ice cream maker for Christmas. I plan to embark on numerous, exciting ice cream adventures, hence the Ice Cream Adventures set in Flickr.

I've made frozen desserts before without an ice cream maker, so it can be done, but it's painstaking, as chronicled in my successes with triple berry sorbet and ginger ice cream.

First I tried some honey vanilla frozen yogurt.

Honey vanilla frozen yogurt with caramel sauce

It was semi-successful. Dave seems to want "healthy" desserts so I tried making it with less sugar. Which I know now is important to the freezing process. This one was a little too frozen... At the end I swirled in some honey so it was honey vanilla frozen yogurt! :oD A good idea, but should of made it with all the sugar. ;o) It's shown here with some caramel sauce drizzled over it

For Sunday dinner one night with my fam, my mom decided to have pumpkin pie, so I made this buttered pecan ice cream to go with it. :oD

Look at the sexy vanilla bean flecks!

I didn't know it would take almost 3 times as long as the frozen yogurt to simmer and whatnot so it was more like soft serve than ice cream, but here it is in its fully frozen state. Again, it was a bit hard to scoop but it tasted AMAZING. It was my first time using a real vanilla bean for anything and it smelled heavenly while cooking.

Look at the sexy vanilla seeds, it's delicious.

Buttered pecan deliciousness

Keep your eye on the flickr set for more to come!

Friday, January 7, 2011

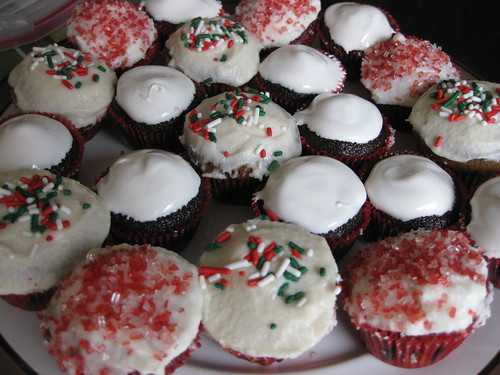
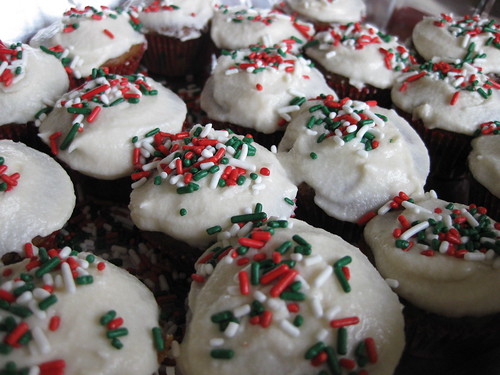
Christmas Mini Cupcake Trio

My blog sort of lives in the past, that's not very attractive, but here it's still Christmas apparently! :oD

Dave and I had 3 stops to make on Christmas, so since I'm crazy I baked up 3 different mini cupcakes to cart around to each Christmas party with me! And they all came out incredible!


Mini one: Hot cocoa cupcake
Chocolate cupcake with marshmallow frosting


This site has some amazing cupcakes. No recipes have failed me yet from it! Marshmallow frosting was good, but not as sturdy as I would of hoped. I just didn't see marshmallow cream at the store, so I used the substitution below for marshmallow cream:

For 1 cup marshmallow cream heat 16 large or 160 miniature marshmallows + 2 tsp corn syrup in the top of a double boiler.

Seemed to work out fine? But it never formed hard peaks when I added my whites to the marshmallow cream, perhaps I didn't whip the egg whites enough? I'll try again with more patience.

Mini Two: Gingerbread
Gingerbread cupcake with vanilla buttercream frosting


This was delicious, it might of been my favorite out of the trio. I should of spent more time with the frosting and added more powdered sugar, but had places to go, dammit. I always forget to sprinkle the cupcakes as soon as I frost them! Otherwise the sprinkles just roll off!

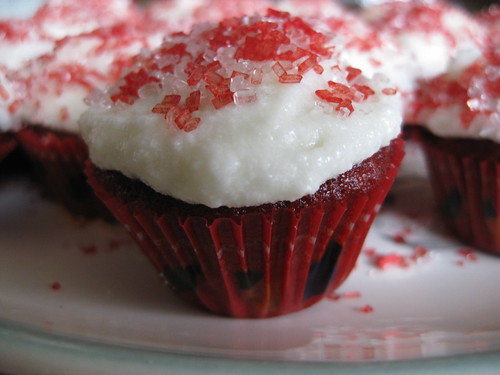
Mini Three: Red Velvet Peppermint
Red velvet cupcake with peppermint buttercream frosting


This is the second time I've made these red velvet cupcakes and they turned out great this time around as well. (Here was the first try.) I think they were everyone's favorite out of the trio.

Tuesday, December 14, 2010

Funfetti!

Tis the season for holiday treats, but it was also my friend Kristine's birthday last weekend!


Perfect occasion for homemade funfetti cupcakes! I used my standard go to for some vanilla buttercream too.

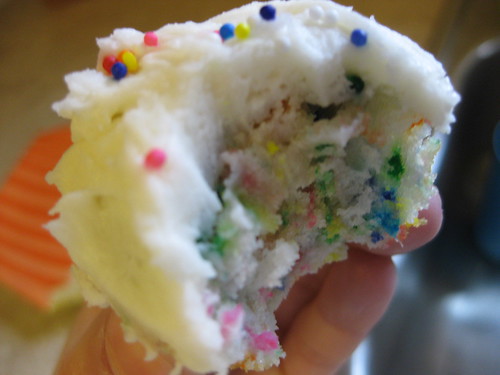
They came out great, only issue was the color on my sprinkles started to run and pretty soon they were mostly tye dye cupcakes. Then, well, when all colors start to mix, you get gray. But they still tasted good!

That is all! Lots more and super cute on the flickr page. Back to Christmas crafting! good night!
Related Posts with Thumbnails