Pages

Showing posts with label mini. Show all posts

Thursday, November 17, 2011

Apple Almond Streusel Mini Muffins

I made these for a Halloween treat for my office. They disappeared from the kitchen almost immediately. Here we have apple almond streusel mini muffins!

Mini almond apple streusel muffin

The original recipe calls for Amaretto which usually I'm all for, but I didn't have any on hand. Someone must have drank it all...hmm... I've noted the substitution below! Also I suggest increasing the streusel topping, I wish I'd had more, so I've bumped it up in the recipe below. It's hard to have too much crumb topping. :o)

Apple Almond Streusel Mini Muffins
Adapted from ButterYum

For the streusel topping

3 tablespoons all-purpose flour
3 tablespoons brown sugar
1/4 teaspoon plus a pinch extra ground cinnamon
3 tablespoons sliced or finely chopped almonds
3 tablespoons butter, chilled

For the muffins

1 1/2 cups all-purpose flour
1/2 teaspoon baking powder
1/4 teaspoon salt
1/4 teaspoon baking soda
3/4 cup sugar
2 ounces cream cheese
4 tablespoons unsalted butter, softened
1/4 - 1/2 teaspoon almond extract OR 2 tablespoons amaretto (almond liqueur)
1 teaspoon vanilla extract
1 large egg
1/2 cup sour cream
1/4 cup milk
3/4 cup finely chopped apple apples
1 tablespoon all-purpose flour
Make the streusel topping
  1. In a small bowl, combine flour, brown sugar, cinnamon and almonds.
  2. Cut in the butter using a pastry cutter, fork or by hand until the mixture resembles coarse crumbs.
  3. Place in fridge until ready to use.

Make the muffins
  1.  Preheat to 350F and line muffin pan with paper liners. 
  2. In a small bowl, whisk together the flour, baking powder, salt, and baking soda and set aside.
  3. In a second small bowl, combine apples and 1 tablespoon flour and also set aside for later.
  4. In a third small bowl, combine sour cream and milk and set aside for later.
  5. In a large bowl, cream together the cream cheese and butter.
  6. Add the sugar and beat until fluffy. 
  7. Add almond extract (or Amaretto), vanilla extract, and egg and beat until well blended. 
  8. With the mixer on slow, add 1/3 of the flour mixture, then 1/2 of the sour cream mixture, the another 1/3 of the flour flour, then the remaining 1/2 sour cream, and finally the remaining 1/3 flour mixture. 
  9. Stir in apples and spoon into prepared pan.
  10. Go get your streusel topping and sprinkle it generously on top of the unbaked muffins.
  11. Bake for 10 - 12 minutes or until a toothpick inserted in the center comes out clean.
  12. Cool in pan on wire rack for 15 minutes, then remove from pan and cool completely.
Office party mini muffins

Streusel topping

Tuesday, October 25, 2011

Mini Pumpkin Spice Latte Cupcakes

These are quite possibly one of my favorite cupcakes I've ever made. Ever. You can taste both the pumpkin and the coffee. I love the whipped cream frosting and the vanilla bean caramel is super impressive and delicious. These cupcakes look great and they taste incredible.

Mini pumpkin spice latte cupcake 


Friday, October 14, 2011

Brown Sugar Maple Glazed Baked Mini Donuts

I love brown sugar. When I can, I've been sneaking it into things to make them extra tasty, like my brown sugar snickerdoodles. I did the same here for these brown sugar, maple glazed baked mini donuts! I brought them to a brunch and they went over very well!

Maple glaze on donut

This made about 30 mini donuts. Also the glaze came out a little thin and I had to re-dip them. Although it's possible they could not have been cooled all the way, so just in case, don't add all the milk to the glaze at once! Add it little by little to make sure you get the right consistency!

Also I always use a piping bag to fill the pan with mini donuts. A spoon just won't cut it, so if you don't have real piping bags do the trick with a zip lock bag instead. I pipe in a somewhat thick "layer" of batter into the bottom of each cavity. If filled too much they won't look like donuts after they rise!


Brown Sugar Maple Glazed Baked Mini Donuts
Adapted from Glorious Treats

For the donuts
1 1/4 cups all purpose flour
1/4 cup granulated sugar
1/4 cup brown sugar
1 1/4 teaspoons baking powder
1/2 teaspoon salt
1/2 cup buttermilk
1 egg
1 1/2 Tablespoons butter, melted
  1. Preheat oven to 425 F.  Spray mini doughnut pan with nonstick cooking spray
  2. In a large mixing bowl, sift together flour, sugar, baking powder and salt.
  3. Add buttermilk, egg, and butter and stir until just combined.
  4. Pipe the batter into your donut pan with a piping bag or zip lock bag with the end snipped off.
  5. Bake 4-6 minutes or until the top of the doughnuts spring back when touched. 
  6. Cool in pan 1-2 minutes, then transfer to a cooling rack. 
For the maple glaze

1 cup powdered sugar
2 Tablespoons milk
1 to 1 1/2 teaspoons pure maple extract
  1. In a small bowl, stir together sugar, milk and extract until sugar is completely dissolved.  
  2. Make sure donuts are completely cooled, then use glaze immediately to dip the donuts.
  3. Place on baking sheet until glaze is set
Maple glazed mini baked donuts

Friday, May 20, 2011

Mini Nutella Donuts

Donuts usually make people happy, and mini things are extra cute so in my opinion these mini Nutella donuts are pretty much perfect. ;o) Plus they're baked so you can sort of feel good about eating them. You do need a mini donut pan though, I bought mine at amazon.

Mini Nutella donut with spring nonpareils

Baked Mini Nutella Donuts
Adapted from Squirrel Bakes

Yields 24 mini donuts, or 8-10 regular sized donuts

For the donuts

1 cup all-purpose flour
2 tablespoons unsweetened cocoa powder
1 teaspoon baking powder
1/4 teaspoon baking soda
1/2 teaspoon salt
1/3 cup granulated sugar
2 tablespoons butter, chilled
1/3 cup whole milk
1/4 cup Nutella
1 teaspoon vanilla extract
1 egg, beaten
  1. Preheat oven to 350 degrees. Lightly grease donut pan.
  2. In a large bowl combine flour, cocoa powder, baking powder, baking soda, salt, and sugar. Whisk together to mix.
  3. Using a pastry cutter or two forks cut the butter into the dry mixture till a course texture is formed.
  4. In a small saucepan heat milk till simmering, set aside.
  5. In a medium bowl combine egg, Nutella, vanilla, and warmed milk. Mix together as best you can, the Nutella caused me to have a little trouble with this.
  6. Add dry ingredients to wet and blend just until incorporated. NOTE: If you think you need a little more liquid to make the batter spoonable or pipeable, add a bit more milk just to thin it out a touch
  7. Spoon mixture into donut pan or transfer to a piping bag and pipe into pan.
  8. Bake for 6-8 minutes for minis or until a toothpick entered in center of a donut comes out clean. Or, 8 - 10 minutes for regular sized donuts.
  9. Remove and let cool in pan for 5 minutes
  10. Flip pan over and let donuts cool completely on wire rack.
For the glaze

1/4 cup butter
2 tablespoons whole milk
2 teaspoons light corn syrup
1/2 teaspoon vanilla extract
1/4 cup Nutella
1 cup confectioners' sugar, sifted

  1. In a medium saucepan combine butter, milk, corn syrup, and vanilla.
  2. Whisking as butter melts, heat over medium until butter is completely melted and mixture is combined
  3. Remove from heat and add Nutella. Whisk mixture until Nutella has melted in.
  4. Add the confectioners' sugar whisk until smooth.
  5. While glaze is still hot, dunk the tops of donuts into the glaze and set on a tray lined with wax or parchment paper until dry.
  6. Add sprinkles if desired and let cool till dry to the touch.

Nutella donuts

Mini Nutella donut!

Nutella donut bite

Tuesday, April 26, 2011

Easter Baking Part 1: Homemade Cadbury Egg Cream Cupcakes

I've seen a lot of great inspiration for Cadbury egg cupcakes this year, but I admit I do sort of want to pat myself on the back for these! I made the filling from scratch (to me it tastes just like the cream inside of the chocolate Cadbury eggs!), and cored about 2 dozen minis, then colored part of the filling to look like the yolk and piped the center into each one. Piping tiny egg yolks is when I started to wonder if I was a little bit crazy, but no! They were worth it and were a big hit!

Cadbury egg cream filling!


Mini Chocolate Cadbury Egg Cupcakes
Yields about 2 dozen minis

For the chocolate cupcakes
Adapted from Ming Makes Cupcakes

1 teaspoon baking soda
1/2 cup buttermilk
6 heaping tablespoons cocoa
2 sticks butter
1 cup water
2 cups sugar
2 cups all-purpose flour
1/2 teaspoon salt
2 eggs
1 teaspoon vanilla
  1. Preheat oven to 350 and place paper cupcake liners in pan.
  2. In a small bowl, dissolve baking soda in room-temperature buttermilk.
  3. In a saucepan, melt butter and cocoa together at a low temperature. Whisking until smooth.
  4. Add water and whisk to combine.
  5. In a separate bowl, whisk together sugar, flour, and salt.
  6. Add cocoa mixture and egg and mix at low speed.
  7. Add buttermilk mixture and vanilla and beat until smooth.
  8. Bake for 12-15 minutes or until inserted toothpick comes out clean
For the Cadbury egg cream filling
Adapted from Food.com

1/2 cup light corn syrup
1/4 cup butter
1 teaspoon vanilla
1/4 teaspoon salt
3 cups powdered sugar
1 - 2 tablespoons milk
Yellow food coloring
  1. Cream the butter in a large bowl
  2. Add the corn syrup, vanilla and salt and beat until smooth.
  3. Slowly add the powdered sugar and beat until creamy
  4. Add the milk a little at a time until a consistency you can pipe easily is reached.
  5. Remove about 1/4 of the sugar mixture and place in a small bowl
  6. Add the yellow food coloring to the 1/4 sugar mixture you just set aside and mix well
Fill the cupcakes!
  1. When cupcakes have completely cooled, put them in the fridge for 10 min or so until they firm up a bit. This cake is delicious and moist and can be a bit crumbly.
  2. Fill one pastry bag with the white Cadbury egg cream, and a second pastry bag with the yellow cream.
  3. Once the cupcakes are sufficiently cold, cut out a "cone" from the center of the cupcake.
  4. Cut off the bottom of the "cone" and keep the "hat." (I usually eat the cones...or put them in a bowl to make a parfait out of later!)
  5. Pipe a layer of white cream into the center of the hollowed out cupcake. Then pipe a bit of the yellow cream in the center for the yolk. Then pipe some more of the white on top to cover the yolk, then replace the cupcake hat! Some nice photos of the cone/hat method can be found in this post for Boston cream cupcakes if you like!
Here's my Cadbury egg filling assembly line. It is a little crazy, I know!

Cadbury egg cupcake assembly line

For the chocolate buttercream frosting
Adapted from Cooks.com

9 tablespoons butter

1 1/2 cups powdered sugar

6 tablespoons cocoa
powder
3 - 4 tablespoons milk

  1. Cream the butter in a mixer
  2. In a separate bowl, combine sugar and cocoa.
  3. Add sugar/cocoa mixture to the butter
  4. Slowly add the milk little by little until a nice texture for frosting is reached.
  5. Frost your minis!

Cadburg egg cream filled chocolate mini cupcake

Cadbury egg cupcake

Thursday, March 10, 2011

Mini Maple Angelfood Cupcakes

These are like little maple clouds from heaven.

So tiny! maple angelfood cake

They weren't for an occasion, I just made them randomly one night. They also call for maple glaze, which I didn't make. But you definitely should, it will lend to the mapleyness of them.

In all the baking blogs I read, and shows I watch, and this current cupcake craze that has taken over, I can't say I've ever seen an angelfood cupcake. Well I googled it and of course I'm not the first to think of it. So good! It can be done, here's the recipe!

And here are my findings:
  1. Cake flour doesn't exist. Do I really need to order it? And why use it when you can just use 1 cup of all purpose flour minus 2 tablespoons (1c – 2tbsp)? Turned out great.
  2. USE CUPCAKE WRAPPERS. This is not the first time this has happened to me baking cupcakes without wrappers. Although the cake is baked perfectly on the inside, it's the the pan singes the cake outside and it gets burnt. :o( These photos are from the minis with wrappers that worked out perfectly.
  3. Minis only needed 11 min to bake!
  4. Make the maple glaze. Delicious and sweet with a hint of maple, but if I didn't tell you it was in there, you might not know.
  5. If you're too lazy to cover them and wrap them and just put them in a big baking dish and put them back in the oven, tell the boyfriend if he takes them out to use the oven, the oven has to cool before he can put them back in there. :o/ My own fault...

Mini maple angelfood trio

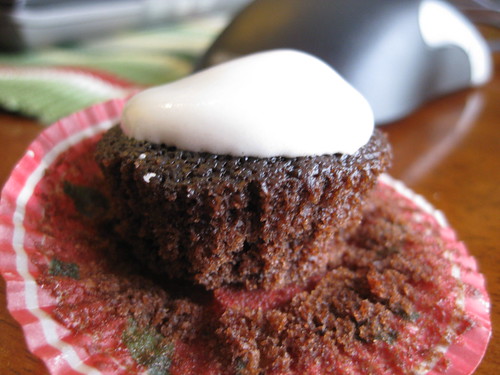
The cuteness factor is a lot of the appeal here, but you need to eat like 12 of them to feel satisfied. ;o) Here's one last perfect little bite of maple angel goodness.

Mini maple angelfood cupcake, unwrapped

Saturday, February 5, 2011

Oreo Cheesecake Cupcakes

For Christmas I received 500 Cupcakes. This is one down, 499 to go!

Oreo cheesecake cupcake

I made these for dessert for one of our girls nights. Plus a birthday dinner the next night and brought some to share with my family for Sunday dinner. :oD

The recipe in 500 Cupcakes is for any standard fruit topped cheesecake with graham cracker crust, but I modified. That's a whole Oreo cookie popped in the bottom of the wrapper for the crust. :oD I wish I could say it was my idea, but I stole it from a friend. It is a good idea, cuts down on baking time when you don't have to mix a crust and press it in the bottom of 24 little cupcakes!

Mini oreo cheesecake

Centers always sink a bit on cheesecakes I think, is that just part of baking a cheesecake? Anyway, I topped these with more crumbled Oreo cookie crumbs and the cheesecake was delicious.

They were a success all around! I'll definitely make them again.

oreo cheescakey goodness

Wednesday, January 26, 2011

Mini Cocoa Madeleine

I finally got to use my mini madeleine pan! Mini baked things are awesome. I made these one snowy afternoon before heading out for girls night.


The recipe came from a random desserts magazine I picked up around Christmas in line in the supermarket. They're REALLY hard not to eat straight out of the oven, especially because they're so mini, I just want to keep snacking on them by the handfuls. Thankfully the recipe made almost 4 pans worth!

I dusted them with powdered sugar before transporting them to the party, they were pretty darn good.

I wish they had more of the shell definition though. My batter had some rather large bubbles in it, I'll have to google what to do about that... hm...


Until then, please check out the new additions to my flickr baking set AND my new adventures in ice cream set!

Friday, January 7, 2011

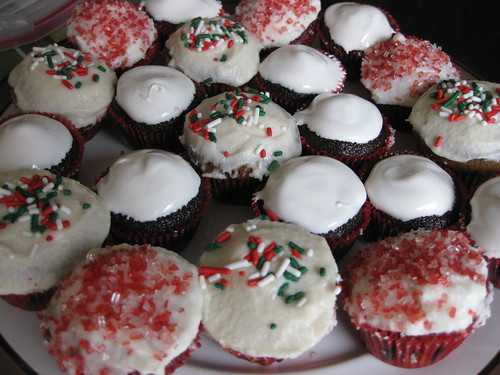
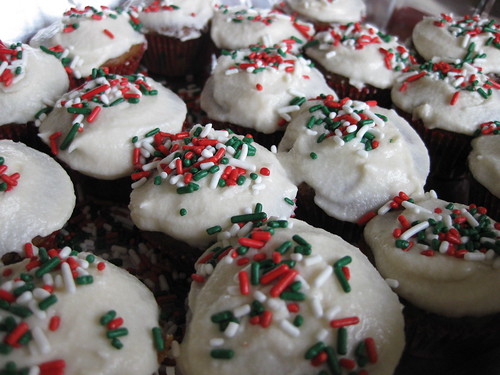
Christmas Mini Cupcake Trio

My blog sort of lives in the past, that's not very attractive, but here it's still Christmas apparently! :oD

Dave and I had 3 stops to make on Christmas, so since I'm crazy I baked up 3 different mini cupcakes to cart around to each Christmas party with me! And they all came out incredible!


Mini one: Hot cocoa cupcake
Chocolate cupcake with marshmallow frosting


This site has some amazing cupcakes. No recipes have failed me yet from it! Marshmallow frosting was good, but not as sturdy as I would of hoped. I just didn't see marshmallow cream at the store, so I used the substitution below for marshmallow cream:

For 1 cup marshmallow cream heat 16 large or 160 miniature marshmallows + 2 tsp corn syrup in the top of a double boiler.

Seemed to work out fine? But it never formed hard peaks when I added my whites to the marshmallow cream, perhaps I didn't whip the egg whites enough? I'll try again with more patience.

Mini Two: Gingerbread
Gingerbread cupcake with vanilla buttercream frosting


This was delicious, it might of been my favorite out of the trio. I should of spent more time with the frosting and added more powdered sugar, but had places to go, dammit. I always forget to sprinkle the cupcakes as soon as I frost them! Otherwise the sprinkles just roll off!

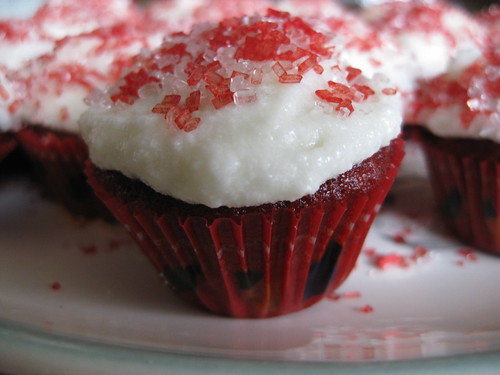
Mini Three: Red Velvet Peppermint
Red velvet cupcake with peppermint buttercream frosting


This is the second time I've made these red velvet cupcakes and they turned out great this time around as well. (Here was the first try.) I think they were everyone's favorite out of the trio.

Tuesday, December 14, 2010

Funfetti!

Tis the season for holiday treats, but it was also my friend Kristine's birthday last weekend!


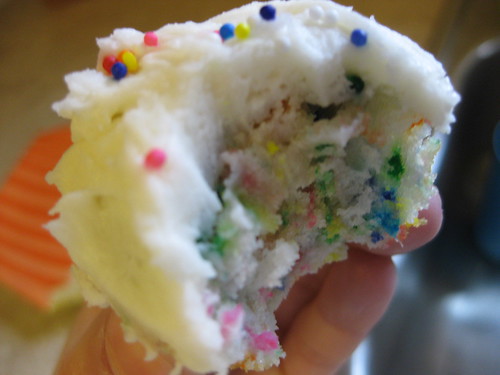
Perfect occasion for homemade funfetti cupcakes! I used my standard go to for some vanilla buttercream too.

They came out great, only issue was the color on my sprinkles started to run and pretty soon they were mostly tye dye cupcakes. Then, well, when all colors start to mix, you get gray. But they still tasted good!

That is all! Lots more and super cute on the flickr page. Back to Christmas crafting! good night!

Saturday, November 20, 2010

Fall baking round up

work has me stressed out, so haven't been keeping up with my little blogger or much baking/crafting for that matter. Flickr has been updated thought!

Here's some cool photos from the season!


Pumpkin muffins!


Apple cider mini donuts! Yes! I got a mini donut pan! <3
My first apple pie all by my big self. With apples we picked from the orchard.


Sexy apple pie slice with homemade ginger ice cream, without and ice cream maker. Still a success! Doesn't go as well with the apple pie as I thought but it's tasty. :oD


Homemade apple butter, would of been great except don't use black pepper in your all spice substitute, worst idea ever.


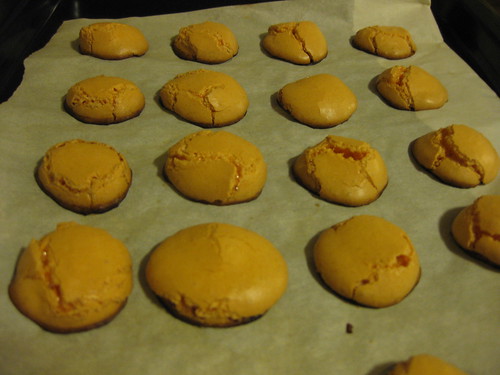
Vanilla and apple butter swiss meringue buttercream macaron. That's cinnamon on top, did it taste like apple cinnamon? No...just sugar. Still looking for a decent macaron recipe, baking instructions are all wrong for the ones I tried so far!


Ghost shaped Count Chocula cereal treats for a halloween party. They were awesome.

Friday, October 22, 2010

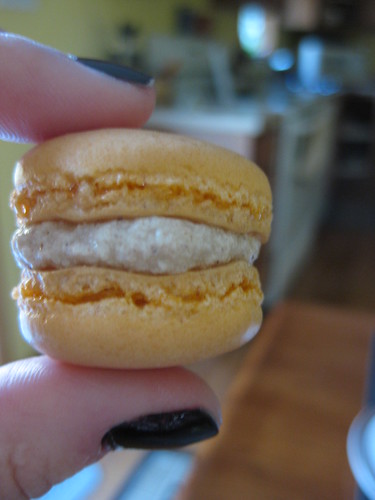
my first french macarons: pumpkin with cinnamon buttercream filling

I love mini desserts. I haven't known about french macarons for long but they're so damn cute I had to learn how to make them. in googling some recipes I saw another blogger mention this book, I Love Macarons by Hisako Ogita which is apparently the macaron bible. Although I have a wishpot which is mostly books, I've sort of sworn off buying baking books or magazines, since there's ssssooooooooo many recipes online. But since my new obsession I decided to stop by Barnes and Noble to see if they had any macaron-ing books, and it was there!

I actually brought it home and read it. Like from cover to cover. I read a review on it later which said something about it originally being published in Japanese? Then translated...this was clearly translated. :o)

Anyway, on to the macarons!


I am pretty impressed they worked the first time around! It was not without incident though. In the book, she describes this method for making butter cream where you make syrup (I guess) by microwaving the hell out of sugar and water for 4 minutes!? This is crazy, I actually did it and burned the hell out of the sugar, surprise, and thought my measuring cup was not going to be salvaged. It was, but that's just a bad idea.

I stuck a bunch of sticky notes all over the pages as well, here are what some of them said, in case you're a first time macaron maker as well:
  1. Seriously...just sift it (she says sift the almond meal and powdered sugar twice, i half assedly did it once...but it makes it much lighter and fluffier...so just sift it, once should do it...)
  2. Cut the damn parchment so it's flat, otherwise macarons may run when piped
  3. Don't pipe onto the same side as the circles are drawn on, it comes off on the macron, oops. Either flip parchment over or make a template on a new piece of paper that you remove after piping.
  4. When getting ready to stir 15 or 20 (or whatever gets the job done, hello) times, add the food coloring at this point
  5. When piping, don't swirl. pipe straight down until it spreads out and fills the circle
  6. Really, make sure the oven racks are in the center, my bottom rack burned. And check em! Mine baked way faster than 15 minutes
Those are my macaron gems of wisdom for you.


But beware when good macarons go bad. Here's what happened to mine that were on the bottom rack and piped by swirling, it's hard to look at...


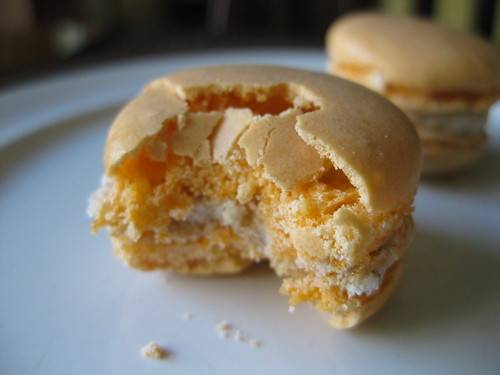
Yikes! Sad... this one is better. :o) They even baked up with the little "foot," without which they can't be called macarons apparently. They're (by "they" I guess I mean the French?) referring to the little crinkley baked up looking part at the bottom of the macaron.


Oh, by the way, to get the pumpkin flavor I used two teaspoons of pureed pumpkin added to the meringue. I have many many bags of pumpkin puree, as it is also the first year I've pureed my own pumpkins and Dave bought me 3. :o) We'll be having pumpkin treats until into the new year I think. :o)

Also here is the recipe I used for the cinnamon buttercream. Good, but super sweet, maybe too sweet? I made a note to try with less sugar next time. Dave confirmed the macrons over all had a nice pumpkin pie taste, so for my first time these were certainly a success. I've decided this winter will be the year of the macaron, so I have more macaron plans to come.

One more sexy macaron picture and the rest are on flickr.

Wednesday, October 20, 2010

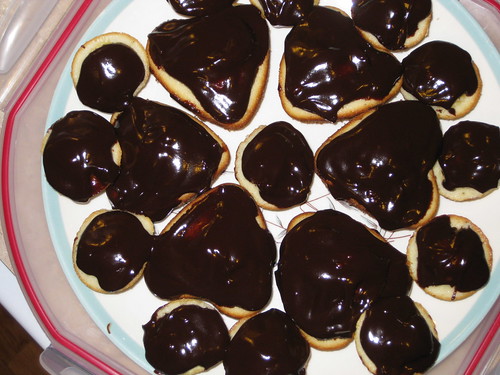
heart shaped 40th anniversary boston cream cupcakes

My parents were married 40 years in September! Dave and I joined them for dinner Sunday night and I made Boston cream cupcakes from a magazine my mom bought. My dad had book marked the recipe for me since he knows about me and cupcakes :o)


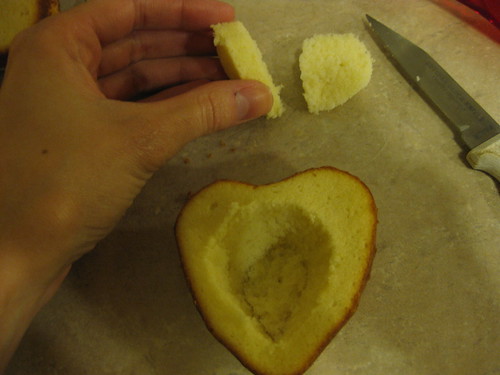
The cupcakes are filled by cutting out the center and slicing away the "cupcake innards," then filling with pastry cream the putting the cupcake top back on. I was pretty sure it would work best with full sized cupcakes so I broke out my heart shaped pan and did the rest in minis. Since I do love minis so.

My only real issue was they're baked without wrappers so the glaze can run amok down the sides, but the edges got a little dark on some of the minis. :o/ Not sure if it was the pans, position of the oven rack or what, because it varied by pan, but most came out good enough!

I thought I'd try piping the filling in on the minis, but no luck, since the cake is denser to support the filling, I ended up "coring" and filling them by hand too. I think it was 1:00 am by the time I finished. Plus I got excited to fill the cupcakes since this was my first filled cupcake, and I filled them all before making the glaze, then realized the glaze is supposed to sit. wah.

Here's my play by play for filling:

1) Slice out cupcake center


2) Slice away middle and save to layer with pastry cream and chocolate glaze for parfait later! :oD


3) Fill!


4) Reassemble the cuppity cake


Fabulous! Here's how they look cut into.


They're best at room temperature so the filling becomes pudding like, but we kept them in the fridge, and it was really hard waiting until they came back to room temp before consuming. The minis especially, you can eat them in one bite. Totally make the effort to fill them with as much pastry cream as possible, that stuff is orgasmic and it's what makes these cupcakes extra amazing.

More in the flickr page, as usual, plus a bunch of fall baking I have yet to post!

Thursday, October 14, 2010

red velvet minis = love

For awhile now I think red velvet has been the new "trendy" cake flavor. Last month (bad blogger!) I had a jewelry party so thought I'd bake up a crowd pleaser! So I chose red velvet mini cupcakes with cream cheese frosting since it seems the traditional combo. Plus Dave doesn't really like cream cheese frosting, but I wasn't baking these for the house or for our friends so I took advantage. Although my party had a small turnout a so bunch of them ended up coming home with me anyway, oh well, I liked em. :o)

I bought red food dye especially for them!


I recently found ming makes cupcakes and I am in love with it. The cupcakes are amazing. Took me awhile to figure out if you click text on the menu bar, you can bookmark individual recipes. So cupcake #4 here is what I used. I had a few other red velvet recipes bookmarked, but chose to use martha's recipe for cream cheese frosting, mostly because the volume and ratio of cream cheese to sugar seemed right.

They certainly came out a success! I didn't have cocoa powder so I melted about 1/2 oz unsweetened bakers chocolate instead of a tablespoon cocoa powder. I ended up with about 38 minis and baked em for 10 minutes.


Look at the sexy red minis! The cream cheese frosting, well, I think I let my cream cheese and butter soften too much because the frosting was way too thin...I added more powdered sugar to try to thicken it up, but I would of preferred less. But it still had a good cream cheese "tang" in the end! I had to put the bowl in the fridge for awhile before I could pipe them.


More in the baking adventures set!

Tuesday, September 28, 2010

cherry almond tea cakes

my grandma turned 94 earlier this month. 94! And she's doing well! She lives with my parents, but she always has, and she doesn't go on trips anymore but she still goes out to bingo every Friday! I need to take up bingo.

Anyway, she likes cherries, so I made these cherry almond tea cakes for her birthday dinner.


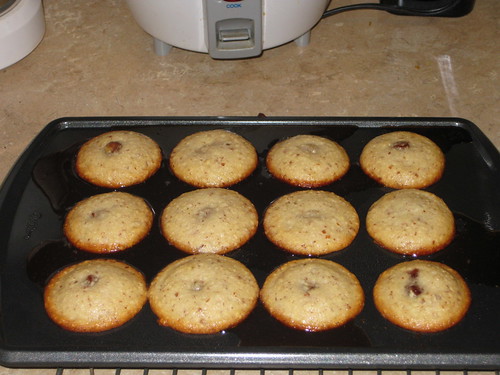
They call for fresh bing cherries with the stems, but the one store I was able to get to the day I had to make them did not have them. So I wouldn't be stuck with cherry-less almond tea cakes, I got a bag of frozen dark sweet cherries. Then stopped by the drug store for some cherry cordial candies, which I thought would be brilliant.

First, some notes from the recipe... (I've been adding notes to recipes I bookmark using delicious, it's really proved very useful!)

The 1-1/2 cup plus 2 Tbsp (1-1/4 sticks) butter confused me...it's 1 and 1/4 sticks, I consulted Martha's recipe she amended. Bad baker that I am, I've never heard of almond meal, nor was it at the A&P, surprise. I chopped up almond slivers, worked fine. Skipped the brandy as I had none and added vanilla extract instead. In the end I definitely needed more cherry flavor. The frozen cherries baked up fine but didn't so much taste very cherry-ful, and the cordials, those were a disaster.

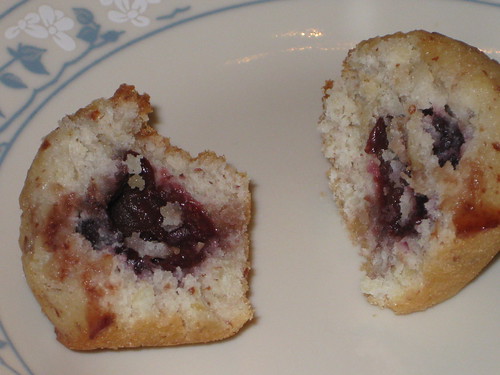
Here's what it looks like when it works, and when it doesn't.

First, the frozen cherry variety. Again, not enough cherry flavor, would definitely be better with fresh cherries. But look at that cute little cherry in the middle! :oD


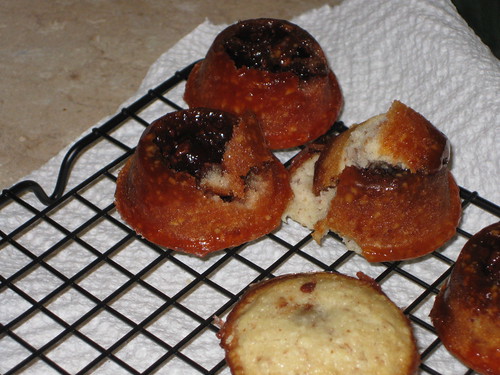
And here's the cherry cordial chocolate disaster.


Some of them actually did make it out of the pan, and while they were warm and gooey they tasted delicious. But the issue is the juice that surrounds the cordial is not supported by the cupcake. It melts away and bubbles out of the cups and on to the pan. Where as it cools is becomes hard candy.


Nightmare. But here's one more of the pretty ones to even it out. More on the flickr page as usual!

Related Posts with Thumbnails