Pages

Saturday, April 30, 2011

Homemade Vanilla Marshmallows - Impress Your Friends

This past Christmas I entertained the idea of making candy as my homemade gift of choice (I made a mini cupcake trio instead). As part of my candy-making research, I looked up how to make homemade marshmallows and it looked incredibly easy! I finally got around to making them for Easter instead!

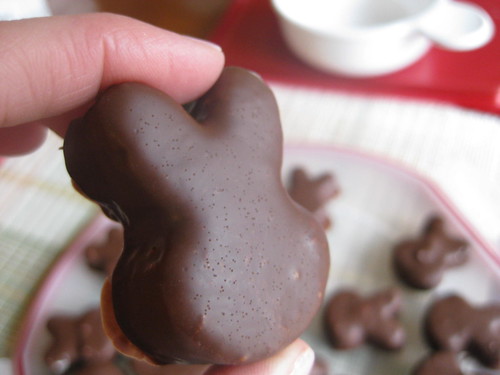
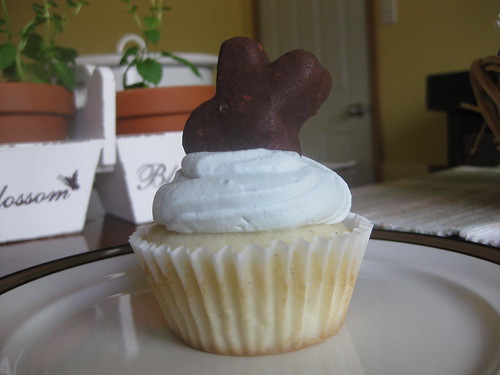
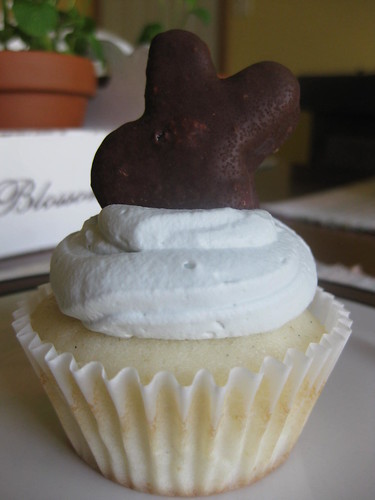
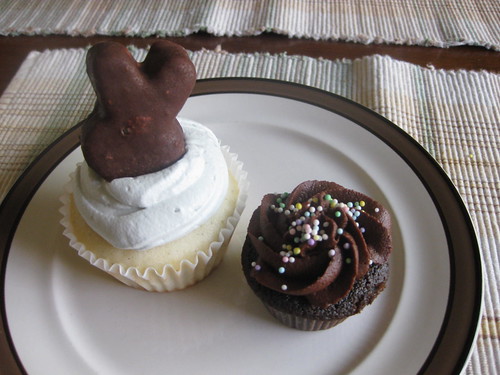
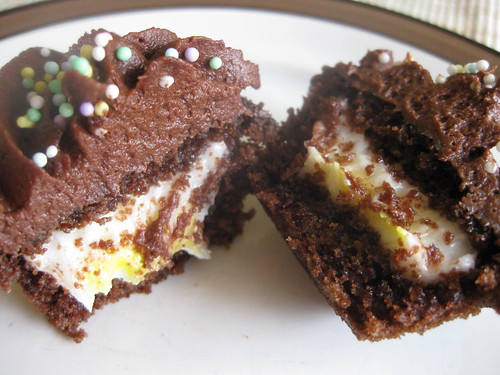
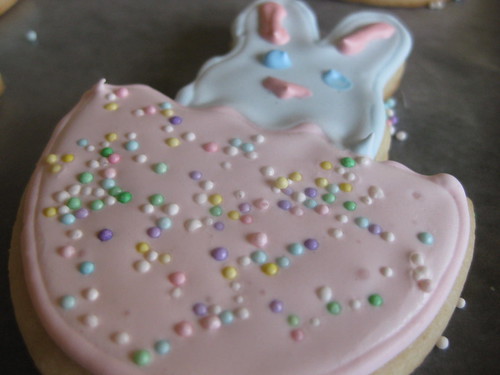
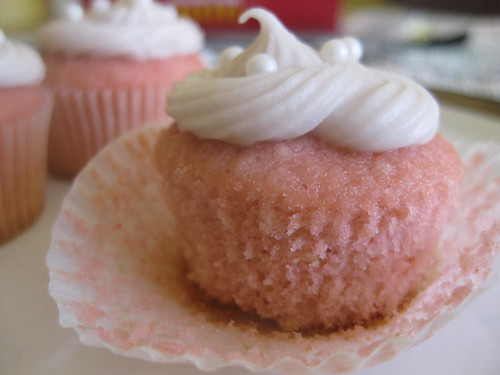
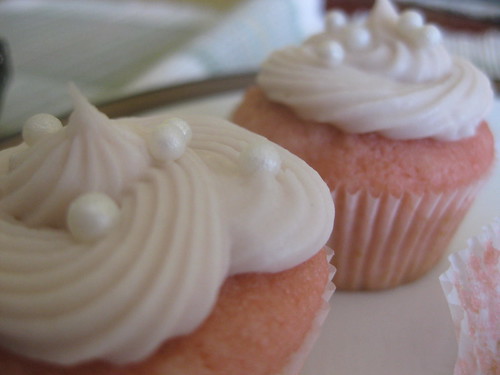
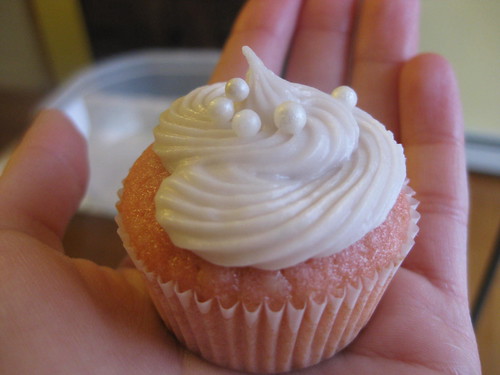
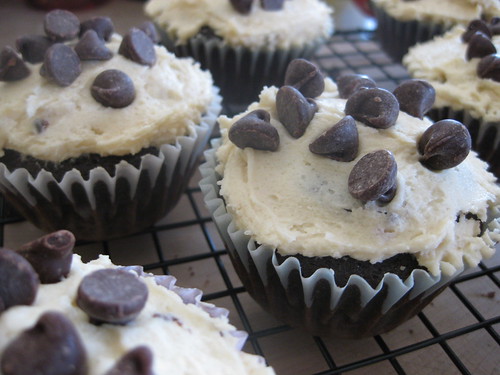
My first plan was chocolate covered marshmallow bunnies, an Easter classic, which I wound up using to top my white velvet vanilla bean and lavender cream cupcakes.

Topped with chocolate marshmallow bunny

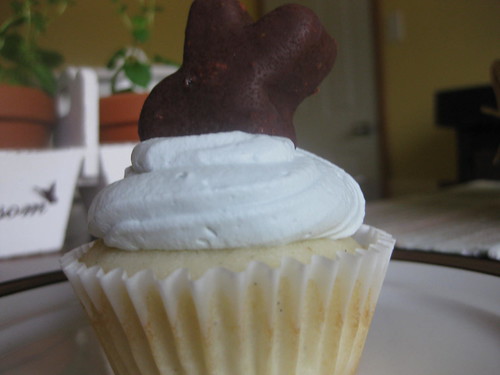
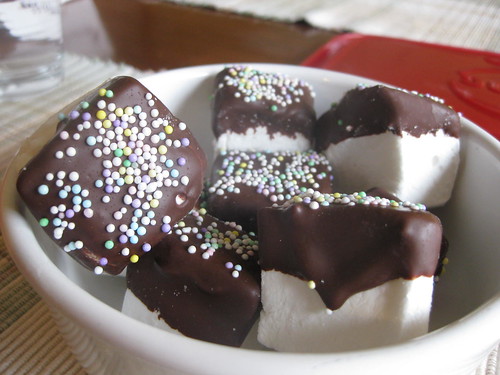
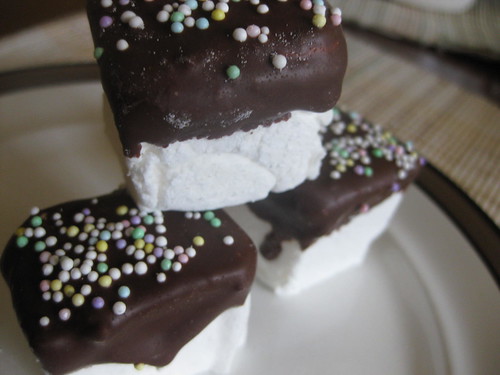
I used a special Wilton mold to make them, and used the rest of the marshmallow spread into an 8 x 8 brownie pan to make chocolate dipped vanilla marshmallows!


Chocolate dipped homemade marshmallows

Before I go ahead and share the recipe, I need to warn you that I made a complete mess out of my stove top making these. The pan was too small and the marshmallow totally boiled over and made a burnt mess all over my stove top. So sad, we're still fighting it with the special stove top cleaner and scrubber. Please don't make my mistake!

Also, you'll see especially on the bunny marshmallows that the chocolate looks sort of speckled. I asked a friend who often makes molded chocolates about this and she thinks maybe my problem was that the confectioners sugar/cornstarch used to coat the marshmallows probably fell off the mixed with the chocolate which caused this. If this happens to you, a good solution would probably be to melt a fresh batch of chips after the first chocolate layer has hardened, and dip them again!

Vanilla Chocolate Covered Marshmallows
Adapted from Alton Brown on Food Network

3 packages unflavored gelatin
1 cup ice cold water, divided
1 1/2 cups granulated sugar
1 cup light corn syrup
1/4 teaspoon kosher salt
2 teaspoons vanilla extract
1/4 cup confectioners' sugar
1/4 cup cornstarch
Nonstick spray
Semi-sweet chocolate chips
2 - 4 tablespoons Crisco
  1. Place the gelatin into the bowl of a stand mixer along with 1/2 cup of the water. Give it a quick stir to moisten. Attach whisk attachment.
  2. In a medium saucepan combine the remaining 1/2 cup water, granulated sugar, corn syrup and salt and stir to combine.
  3. Place over medium high heat, cover and allow to cook for 3 to 4 minutes.
  4. Uncover, clip a candy thermometer onto the side of the pan and continue to cook until the mixture reaches 240 degrees F, approximately 7 to 8 minutes.
  5. Once the mixture reaches this temperature, immediately remove from the heat.
  6. Turn the mixer on low speed and, while running, slowly pour the sugar syrup down the side of the bowl into the gelatin mixture.
  7. Once you have added all of the syrup, increase the speed to high.
  8. Continue to whip until the mixture becomes very thick and is lukewarm, approximately 12 to 15 minutes.
  9. Add the vanilla during the last minute of whipping. While the mixture is whipping prepare your pans/molds

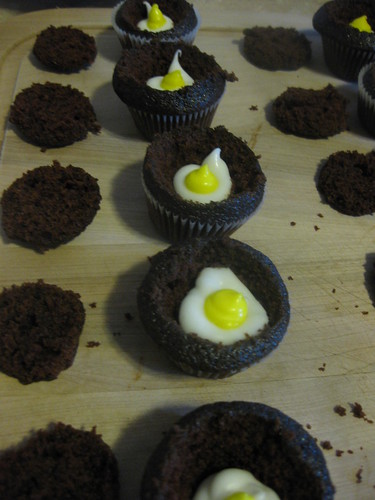
Prepare your pans/molds!

  1. Combine the confectioners sugar and corn starch and whisk well to combine.
  2. Lightly spray the molds or pan with cooking spray and powder all sides with the confectioners sugar mixture
  3. For the molds, I filled a pastry bag with the freshly whipped marshmallow and piped it into the bunny shapes!
  4. For the pan, lightly spray a rubber spatula with cooking spray and smooth the marshmallow into the pan.
  5. Dust the exposed sides with the remaining confectioner sugar mixture. If you're using a pan, you can set some aside for when you cut them apart.
  6. Let the marshmallows sit uncovered for at least 4 hours, and up to 24 hours.

For chocolate covered molded marshmallows
  1. Gently remove the marshmallows from their molds.
  2. Over a double boiler, melt the chocolate chips on low.
  3. Line a baking sheet with parchment paper.
  4. If your chocolate is thin enough for dipping you an skip this step. If it would be easier to dip if the chocolate was thinner, slowly add the Crisco one tablespoon at a time, stirring well and allowing each to melt. Test the consistency of the chocolate between additions.
  5. Quickly dip and roll the marshmallows in the chocolate with a fork. Lift the marshmallow out using the fork and tap on the side of the pot to let some of the excess chocolate drip off. Scrape the bottom against the side of the pan and place on parchment paper. Try and do this pretty quickly, since the marshmallow will start to melt in the hot chocolate!
  6. Place the tray in the fridge for only about 5 minutes or so until chocolate is set.
  7. NOTE: If your chocolate does not dry shiny and looks a little speckled like mine, melt a fresh batch of chocolate and give them another coat.

For chocolate dipped marshmallows

  1. Turn the marshmallows out of a pan and use a pizza cutter lightly dusted in the confectioners sugar/cornstarch mixture to cut the marshmallows apart
  2. Dust each exposed side in the confectioners sugar mixture.
  3. Over a double boiler, melt the chocolate chips on low.
  4. Line a baking sheet with parchment paper.
  5. If your chocolate is thin enough for dipping (which will depend on the chocolate you use) you an skip this step. If it would be easier to dip if the chocolate was thinner, slowly add the Crisco one tablespoon at a time, stirring well and allowing each to melt. Test the consistency of the chocolate between additions.
  6. Dip the top of each marshmallow into the chocolate and set on a parchment (chocolate side up)
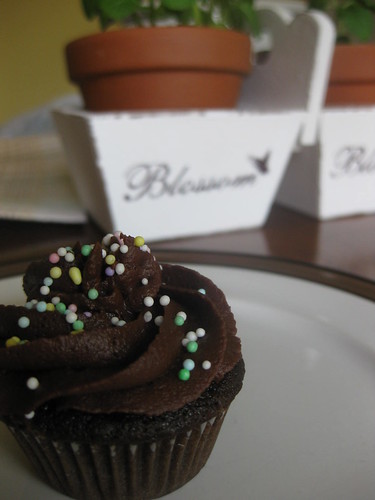
  7. Decorate as you like!
  8. Place the tray in the fridge for only about 5 minutes or so until chocolate is set.

Homemade chocolate covered marshmallows

Chocolate dipped marshmallows

Thursday, April 28, 2011

Easter Baking Part 2: Vanilla Bean Lavender Cupcakes

To accompany my Cadbury egg cupcakes, I baked up these white velvet vanilla bean cupcakes topped with lavender cream and a homemade chocolate covered marshmallow bunny!

White velvet vanilla bean lavender cupcake

They were 4 days in the making! Thursday I made the marshmallows. Friday I coated them in chocolate. Saturday I baked the cupcakes, and on Sunday I finished the lavender cream and assembled for Easter dessert! Not that you have to take 4 days to make them, but the lavender needs to steep for 24 hours and the marshmallows have to set out over night, so it's a process!

In case you're wondering what lavender cream tastes like...it tastes pretty much just like it smells (in my opinion, anyway). Which is good news if you like the scent of lavender! The taste is very mild and you can smell the lavender in the cream, but it is something different! My family are always willing taste testers in my baking adventures, and I'll certainly make the cupcake again! But if I were to make these for a crowd, I'd probably also offer a regular or vanilla whipped cream cupcake as an option as well. A little something for everyone!

For now I'll just link to the marshmallow recipe here. I have more marshmallow creations to share that I'll wrap up in another post! Until then, on to the cupcakes! Please be sure to read the full recipe first, since the lavender cream has to be prepared a day ahead! Also please note the whipped lavender cream is pretty delicate and will start to melt if out of the fridge for too long. Keep your travel and serving plans in mind. ;o)

Vanilla Bean Lavender Cupcakes

Yields about 24 regular sized cupcakes

For white velvet vanilla bean cupcakes
Adapted from Java Cupcakes

1 1/4 cup milk (divided)
1/4 cup sour cream
1/2 teaspoon pure vanilla
1 vanilla bean
1 1/2 sticks unsalted butter
1 1/2 cups sugar
4 large egg whites
3 cups sifted cake flour (if you can't find cake flour, substitute 2 1/4 all purpose flour plus 6 tablespoons cornstarch sifted together, but try to find the cake flour! It comes in a box!)
1 tablespoon plus 1 teaspoon baking powder
1/2 teaspoon salt
  1. Preheat oven to 375 and line cupcake pans with liners.
  2. Put 1 cup of the milk in a small sauce pan and set on medium heat.
  3. Slice the vanilla bean down the center and scrape out as many seeds as you can and add to the cream. Then, add the whole vanilla bean pod to the cream.
  4. Add the sour cream and vanilla extract to the sauce pan
  5. Continue to cook until the milk starts to steam and bubbles begin to form around the outer edge of the milk, whisking occasionally.
  6. Remove from heat immediately and let cool for 5-10 minutes.
  7. Remove the vanilla bean pod from the sauce pan and discard.
  8. In a large bowl, combine cake flour, baking powder and salt whisk together.
  9. In the bowl of an electric mixer cream the butter and sugar together until light and fluffy.
  10. Add the eggs and mix on high just until they start to whip up like frosting.
  11. Add 1/3 of the flour mixture on low and continue mixing to combine. Add half the vanilla cream, then another 1/3 flour mixture, then the second half of the cream, and finally the last 1/3 of the flour mixture. Be careful not to over mix.
  12. Add the last 1/4 cup of milk and mix just until combined.
  13. Fill each cupcake liner about 2/3 full.
  14. Bake 15-18 minutes.
  15. Let the cupcakes cool in the pan for 5-10 minutes before removing to a wire wrack to cool completely. They should be 100% cool before you try to top them with the lavender cream!
For the lavender cream

2 cups heavy cream (whipping cream)
5 tablespoons dried lavender
2 tablespoons sugar
Purple/blue food coloring (optional)
  1. Pour the cream into a bowl or measuring cup and whisk in the dried lavender.
  2. Leave it to steep for at least 24 hours in the fridge
  3. When ready, strain the lavender out of the cream and add the cream to a metal bowl (it will whip up better if it stays cold)
  4. Whisk in the food coloring if desired - if you choose not to use food coloring, the cream won't be pure white, but it won't really be lavender either :o)
  5. Using the whisk attachment or a hand mixer, start to whip the cream on high.
  6. It will start to form bubbles, then start to look foamy, then become smoother and start to increase in size.
  7. One it has passed the foamy stage, keep whipping on high and slowly add the sugar
  8. Keep whipping until stiff peaks are just about formed then STOP! You don't want to over whip the cream since it will start to turn to butter, that would be sad.
  9. Top the cupcakes with a dollop of cream and serve immediately, or pop em in the fridge til ready! (I also considered keeping the cream in the metal bowl and bringing it with me to assemble there, but it was just too many things to pack up!)
Happy lavendering!

White velvet vanilla bean lavender cupcake

Easter cupcakes

Tuesday, April 26, 2011

Easter Baking Part 1: Homemade Cadbury Egg Cream Cupcakes

I've seen a lot of great inspiration for Cadbury egg cupcakes this year, but I admit I do sort of want to pat myself on the back for these! I made the filling from scratch (to me it tastes just like the cream inside of the chocolate Cadbury eggs!), and cored about 2 dozen minis, then colored part of the filling to look like the yolk and piped the center into each one. Piping tiny egg yolks is when I started to wonder if I was a little bit crazy, but no! They were worth it and were a big hit!

Cadbury egg cream filling!


Mini Chocolate Cadbury Egg Cupcakes
Yields about 2 dozen minis

For the chocolate cupcakes
Adapted from Ming Makes Cupcakes

1 teaspoon baking soda
1/2 cup buttermilk
6 heaping tablespoons cocoa
2 sticks butter
1 cup water
2 cups sugar
2 cups all-purpose flour
1/2 teaspoon salt
2 eggs
1 teaspoon vanilla
  1. Preheat oven to 350 and place paper cupcake liners in pan.
  2. In a small bowl, dissolve baking soda in room-temperature buttermilk.
  3. In a saucepan, melt butter and cocoa together at a low temperature. Whisking until smooth.
  4. Add water and whisk to combine.
  5. In a separate bowl, whisk together sugar, flour, and salt.
  6. Add cocoa mixture and egg and mix at low speed.
  7. Add buttermilk mixture and vanilla and beat until smooth.
  8. Bake for 12-15 minutes or until inserted toothpick comes out clean
For the Cadbury egg cream filling
Adapted from Food.com

1/2 cup light corn syrup
1/4 cup butter
1 teaspoon vanilla
1/4 teaspoon salt
3 cups powdered sugar
1 - 2 tablespoons milk
Yellow food coloring
  1. Cream the butter in a large bowl
  2. Add the corn syrup, vanilla and salt and beat until smooth.
  3. Slowly add the powdered sugar and beat until creamy
  4. Add the milk a little at a time until a consistency you can pipe easily is reached.
  5. Remove about 1/4 of the sugar mixture and place in a small bowl
  6. Add the yellow food coloring to the 1/4 sugar mixture you just set aside and mix well
Fill the cupcakes!
  1. When cupcakes have completely cooled, put them in the fridge for 10 min or so until they firm up a bit. This cake is delicious and moist and can be a bit crumbly.
  2. Fill one pastry bag with the white Cadbury egg cream, and a second pastry bag with the yellow cream.
  3. Once the cupcakes are sufficiently cold, cut out a "cone" from the center of the cupcake.
  4. Cut off the bottom of the "cone" and keep the "hat." (I usually eat the cones...or put them in a bowl to make a parfait out of later!)
  5. Pipe a layer of white cream into the center of the hollowed out cupcake. Then pipe a bit of the yellow cream in the center for the yolk. Then pipe some more of the white on top to cover the yolk, then replace the cupcake hat! Some nice photos of the cone/hat method can be found in this post for Boston cream cupcakes if you like!
Here's my Cadbury egg filling assembly line. It is a little crazy, I know!

Cadbury egg cupcake assembly line

For the chocolate buttercream frosting
Adapted from Cooks.com

9 tablespoons butter

1 1/2 cups powdered sugar

6 tablespoons cocoa
powder
3 - 4 tablespoons milk

  1. Cream the butter in a mixer
  2. In a separate bowl, combine sugar and cocoa.
  3. Add sugar/cocoa mixture to the butter
  4. Slowly add the milk little by little until a nice texture for frosting is reached.
  5. Frost your minis!

Cadburg egg cream filled chocolate mini cupcake

Cadbury egg cupcake

Sunday, April 24, 2011

Peach and Raspberry Buttermilk Muffins

I don't know why buttermilk never comes in any size less than a 1/2 gallon. At least I've never seen it if it does... Who needs that much buttermilk?

Anyway, that's the reason I made these muffins, I needed to use up some buttermilk. Plus I'm still trying to bake some healthier treats for grab and go breakfast in the morning.

Buttermilk peach raspberry muffin

These muffins came out moist and tasty. I used frozen raspberries and peaches, but you can substitute any fruit you like really, frozen or fresh. You may just need to bake them a little longer if you use frozen like I did!

Peach and Raspberry Buttermilk Muffins
Adapted from Joy of Baking

2 1/2 cups all-purpose flour
3/4 cup sugar
2 teaspoons baking powder
1/2 teaspoon baking soda
1/4 teaspoon salt
1 egg
3/4 cup buttermilk
2/3 cup vegetable oil
1 teaspoon pure vanilla extract
1/2 cup frozen raspberries
1/2 cup coarsely chopped frozen peaches
  1. Preheat oven to 375 degrees F and line muffin pan with liners.
  2. In a mixer, whisk together the egg, buttermilk, oil, and vanilla extract.
  3. In another large bowl combine the flour, sugar, baking powder, baking soda and salt.
  4. Gently stir in dry ingredients into wet ingredients. Careful not to over mix.
  5. Gently fold in the raspberries and peaches
  6. Fill each muffin cup almost full
  7. Bake in oven about 20 minutes or until toothpick inserted in center comes out clean.
  8. Transfer to a wire rack and let cool.

Butttermilk peach raspberry muffin

Peach raspberry muffin inside

Saturday, April 23, 2011

Lemon Cut Out Easter Cookies - Adventure in Royal Icing

These cookies were my first try at all out royal icing decorating. I got my feet wet with these gingerbread cookies this Christmas, but this time I was dedicated to coloring, outlining, thinning, flooding, etc! Here's how they came out!

Easter cookie plate

Eeehhhh...okay for a first try! I need more practice with finding the right consistency for piping and flooding. And I need more patience. I got tired of coloring and mixing and stirring! Ah! They took me all weekend! I rolled them out and baked them Friday. Then Saturday I started the decorating. And then I ran out of royal icing and had to wait for the first round of icing to dry, so I finished them Sunday. Finally!

If you want to laugh here are the links what I used for inspiration. Wilton chick and bunny cookies.

Bunnies and chicks and cookies OH MY!

I'll keep practicing! Both the cookie and icing came out nice and lemony though!

Lemon Cut Out Cookies
Adapted from Bake at 350

For the cookies

3 cups unbleached flour
2 teaspoons baking powder
1 cup sugar
2 sticks butter
1 egg
1/2 teaspoon vanilla
1/2 teaspoon fresh lemon juice
3/4 teaspoon grated lemon zest
  1. Preheat oven to 350.
  2. In a medium bowl, whisk together the flour and baking powder. Set aside.
  3. Cream the butter and sugar together until fluffy.
  4. Add in the egg, vanilla, lemon juice and zest and beat until combined.
  5. Slowly add in the flour until dough is formed.
  6. Roll out on a floured surface and cut into shapes about 3/8 to 1/4" thick.
  7. Place on parchment lined sheets. Freeze 5-10 minutes on the sheets before placing in the oven (this will help prevent cookies from spreading).
  8. Bake 9-12 minutes, depending on cookie cutter size.
  9. Transfer cookies to a cooling rack and let cool completely.
For the icing

4 tablespoons meringue powder
scant 1/2 cup water
3 1/2 cups powdered sugar
1/2 teaspoon light corn syrup
1/4 teaspoon lemon extract
  1. Combine the meringue powder and water and beat until foamy.
  2. Slowly add the powdered sugar on low and beat on low to combine.
  3. Add in the corn syrup and lemon extract
  4. Increase speed to medium high and beat for about 5-10 minutes, just until the icing is glossy and stiff peaks form.
  5. Add more water a teaspoon at a time if consistency needs adjusting to be pipable.
I also used Bake at 350's instructions for decorating, lots of good photos!

Bunny and chick lemon cutout cookies

Spring time non pareils

Sunday, April 17, 2011

Rye Bread Rolls

I love bread, I love it. I found this recipe for rye bread rolls that look way easy. So one night when Dave handled dinner, I came home and decided I was going to whip them up. It was my first attempt at any sort of yeast bread!

Fresh rye rolls

I think they came out pretty good! I followed all the instructions, kneaded, let it rise, knead, let rise, then popped em in the oven. Then I started googling baking rye bread and got scared that the recipe and method I found was too good to be true. Maybe it was beginners luck though because they were delicious. They don't quite keep the same past a day or two though, so eat em quick!

My first yeast bread

Rye Bread Rolls
As posted by Divine Baking

2 1/2 cups rye flour
4 - 4 1/2 cups white flour
1 tablespoon salt
1 1/2 tablespoons yeast
1/2 cup buttermilk
2 tablespoons honey
2 cups water
  1. Sift the rye flour and 4 cups white flour into a large bowl
  2. Add the salt and yeast and whisk to combine
  3. Create a hole in the center of the flour mixture and add the buttermilk, honey and water.
  4. Mix until a dough has formed.
  5. Flour a flat surface and knead the dough for about 10 minutes until soft.
  6. Place the dough in a oiled bowl, cover and leave to rise for 60 - 90 minutes (until dough has doubled).
  7. Knead the dough and divide into 10 rolls.
  8. Place on a baking sheet covered with parchment paper.
  9. Flatten each roll slightly. Cover with a plastic wrap and leave to rise for 45 minutes.
  10. Preheat oven to 400 F, and place a pan filled with water on the bottom of the oven (will create steam in oven)
  11. Sprinkle some flour on the rolls and slash an X in the top of each roll with a sharp knife.
  12. Bake for 25 - 30 minutes, until the rolls have browned.
  13. Let cool on a cooling rack.
  14. Eat them!
Rye roll success

Friday, April 15, 2011

Mini Cham Cham Cupcakes

A cham cham is a glass of champagne with a splash of Chambord, yyyuuummmmm! Try it, it's delicious, and it's what inspired these cupcakes for girls night. They're a pink champagne cupcake with vanilla Chambord buttercream frosting. I heart boozy baking.

Pink starwberry champagne cake

I think the pearl sprinkles are a nice touch too, they remind me of champagne bubbles! Also the Chambord adds the slightest purple tint to the frosting!

Cham Cham Cupcakes

For the cupcakes
Adapted from gimee some oven

Yields around 30ish minis

1 cup plus 6 tablespoons all-purpose flour
1 1/2 teaspoon baking powder
1/2 teaspoon salt
1/3 cup butter
3/4 cup sugar
1/4 cup strawberry champagne
3 egg whites
Pink food coloring
  1. Preheat oven to 350 degrees F. Prepare a cupcake pan with liners.
  2. In medium bowl, stir together flour, baking powder, and salt.
  3. In a large bowl, cream together butter and sugar until light and fluffy.
  4. Slowly add the flour mixture to the butter and sugar mixture.
  5. Mix in the champagne.
  6. In another clean bowl, beat egg whites until stiff peaks form.
  7. Begin folding the egg whites into the batter. Add your pink food coloring as you fold.
  8. Fill the cupcake liners about 2/3 full.
  9. Bake for 10 - 12 minutes, or until a toothpick inserted into the cake comes out clean.
For the frosting
Adapted from Ming Makes Cupcakes

1/2 stick butter
1 1/2 cup plus 6 tablespoon confectioners sugar
1/2 teaspoon vanilla
1/8 cup milk
1/16 cup Chambord plus extra to taste (without wrecking consistency, btw I halved the recipe here, 1/16 is sort of silly to measure, you can just eyeball it)
  1. In a saucepan, melt butter at low temperature.
  2. Add vanilla and milk to melted butter in mixer and beat at low speed until combined.
  3. Add confectioners sugar and beat until smooth.
  4. Mix in Chambord, starting with the 1/16 cup. Slowly add to your taste, being sure the consistency of the frosting holds up and doesn't get too soupy.
  5. When ready frost away and eat!


Vanilla chambord frosting

Pink champagne cupcake with vanilla chambord frosting

Saturday, April 9, 2011

Chocolate Chocolate Cookie Dough Filled Cupcakes

These are chocolate cupcakes, with chocolate chocolate chip cookie dough filling, frosted with brown sugar chocolate chip cookie frosting! OMG! So good, I die.

Chocolate chip cookie dough filled chocolate cupcake

The chocolate cake recipe I used is THE BEST I have ever tried. I had intended to put mini chips in the batter, but it is a very thin batter, so the chips would likely sink to the bottom. If you have a chocolate cake recipe you love that would support the chips, go ahead and throw then in!

Note that I adapted the recipes by doubling the cupcake recipe and halving the cookie dough filling and frosting recipes.

Chocolate Chocolate Chip Cookie Dough Cupcakes

For the chocolate cupcakes
Adapted from Ming Makes Cupcakes

1 teaspoon baking soda
1/2 cup buttermilk
6 heaping tablespoons cocoa
2 sticks butter
1 cup water
2 cups sugar
2 cups all-purpose flour
1/2 teaspoon salt
2 eggs
1 teaspoon vanilla
  1. Preheat oven to 350 and place paper cupcake liners in pan.
  2. In a small bowl, dissolve baking soda in room-temperature buttermilk.
  3. In a saucepan, melt butter and cocoa together at a low temperature. Whisking until smooth.
  4. Add water and whisk to combine.
  5. In a separate bowl, whisk together sugar, flour, and salt.
  6. Add cocoa mixture and egg and mix at low speed.
  7. Add buttermilk mixture and vanilla and beat until smooth.
  8. Bake for 20 minutes or until inserted toothpick comes out clean
For the chocolate chocolate chip cookie dough filling
Adapted from Frosted!

2 tablespoons unsalted butter, at room temperature
1 1/2 tablespoons light brown sugar, packed
1 1/2 tablespoons granulated sugar
1 tablespoon unsweetened cocoa powder
1/2 cup plus 1 tablespoon all-purpose flour
3.5 oz. sweetened condensed milk
1/4 teaspoon vanilla extract
1/4 cup mini semisweet chocolate chips
  1. Combine the butter and sugars in a mixing bowl and cream on medium-high speed until light and fluffy.
  2. Beat in the flour, sweetened condensed milk and vanilla until incorporated and smooth.
  3. Stir in the chocolate chips.
  4. Cover with plastic wrap and chill until ready to use.
Fill with cookie dough!
When cupcakes have completely cooled, cut out a "cone" from the center of the cupcake. Cut of the bottom of the "cone" and keep the "hat." Spoon a bit of the cookie dough filling into the cupcake and replace the hat. Some nice photos of this method can be found in this post for boston cream cupcakes.

For the frosting
Adapted from Frosted!

1 1/2 sticks unsalted butter, at room temperature
6 tablespoons cup light brown sugar, packed
1 3/4 cups confectioners’ sugar
1/2 cup all-purpose flour
1/4 teaspoon salt
1 1/2 tablespoons milk (or a touch more if necessary)
1 1/4 teaspoon vanilla extract
  1. Beat together the butter and brown sugar until creamy.
  2. Mix in the confectioners’ sugar until smooth.
  3. Beat in the flour and salt.
  4. Mix in the milk and vanilla extract until smooth and well blended.
  5. Frost away!


Chocolate chip cookie frosting

Surprise chocolate chip cookie dough INSIDE!

Friday, April 1, 2011

Week Night Cherry Almond Macarons

Macaron success! I've made French macarons with varying degrees of success, and I think this time may have been the most successful so far. Around the holidays I bought Martha Stewart's holiday cookie magazine in line at the grocery store, specifically for the macaron recipe, since the others I'd tried so far had mostly let me down. :o(

Lucky for you her recipe is also on her website, so I'll share it with you here. :o) Plus a recipe I made for cherry almond buttercream. Yum.

One of these things is not like the others

In the past, I went out and bought almond flour. But having been burned by my last 3 batches, I didn't want to put the time or money into another shopping trip, so I ground up some slivered almonds in my blender, which is why you can see a bit of the almond skins here. Also...shame on me...I didn't sift my ground almonds and sugar. Shame! All they do it get stuck in my flour sifter and make it impossible to clean! Plus I could only grind the almonds so fine before they would start turning to almond butter instead. So I just whisked the powdered sugar and almonds together really well and went with that.

Before you go ahead with the recipe, I should note that while this was my best attempt, it wasn't perfect. I read somewhere that you should only put one tray of macrons in the oven at once (some say it doesn't matter, and maybe it didn't this time), so that is what I did. The first batch came out perfect! Look at those sexy macaron feet! (The little ruffle that pops up at the bottom.)

The good looking cherry almond macarons

But the second and third batches turned into crazy, topsy-turvy, Dr. Suess macarons. Yikes!

They still taste good...

OMG! My best guess is that perhaps the batter dried out slightly in the piping bag, then in addition I let them dry too long after getting piped on to the tray, and instead of rising, one side or the other stuck? Maybe? Also I misread the instructions for baking about heating the oven for 5 min to 375 between each batch before putting in the next tray. Instead I raised it to 375 each time and made sure it was 375, then lowered to 325, waited 5 min, then put a new tray in. Those are instructions used below since as I said, the first batch was lovely! Either way, no matter how they looked they still tasted good and weren't a cracked, burned mess like some others. So sad.

So keeping that in mind, here goes the recipe!

Cherry Almond Macarons

Vanilla Macaron Shells
Adapted from Martha Stewart

1 cup confectioners' sugar
3/4 cup almond flour (or finely ground almonds)
2 large egg whites
Pinch of cream of tartar
1/4 cup granulated sugar
1/2 teaspoon vanilla extract
  1. Pulse confectioners' sugar and almond flour in a food processor until combined. Sift mixture 2 times. (Shame on me, I didn't sift, just whisked together)
  2. Preheat oven to 375 degrees.
  3. Whisk whites with a mixer on medium speed until foamy. Add cream of tartar, and whisk until soft peaks form. Slowly add in the sugar.
  4. Increase speed to high and after a few moments add the vanilla extract. Continue whisking until stiff peaks form.
  5. Sift confectioners' sugar mixture over whites, and fold until mixture drips slowly, ribbon-like, from the spoon. Don't overwork.
  6. Transfer batter to a pastry bag fitted with a 1/2-inch plain round tip, and pipe 3/4-inch rounds 1 inch apart on parchment-lined baking sheets, dragging pastry tip to the side of rounds rather than forming peaks.
  7. Tap bottom of each sheet on work surface to release trapped air.
  8. Let stand at room temperature for 15 minutes or until tops are dry to the touch.
  9. Reduce oven temperature to 325 degrees 5 minutes before putting the macrons in the oven.
  10. Bake 1 sheet at a time, rotating halfway through, until macarons are crisp and firm, about 10 minutes.
  11. After each batch, increase oven temperature to 375 degrees then reduce to 325 degrees again 5 minutes before putting in a new tray.
  12. Let macarons cool on sheets for 2 to 3 minutes, then transfer to a wire rack. (If macaroons stick, spray water underneath parchment on hot sheet. The steam will help release macaroons.)
  13. Prepare filling below, and once completely cooled, pipe a bit of frosting onto one macaron shell then sandwich with a second shell.
  14. Store in fridge in an air tight container

Cherry Almond Buttercream Frosting


1 6 oz jar maraschino cherries (Approx. 2 1/2 tablespoons pureed)
Approx. 1 tablespoon milk (more or less as needed)
1/2 teaspoon almond extract
1 package powdered sugar (16 ounces)
1/2 cup butter, softened (1 stick)
  1. Drain cherries and reserve juice.
  2. Puree cherries in a blender.
  3. Cream butter and slowly add confectioners sugar
  4. Add pureed maraschino and almond extract
  5. Add reserved juice from cherries and milk alternately to achieve desired texture.

The good cherry almond macarons
Related Posts with Thumbnails