Pages

Friday, March 25, 2011

Oatmeal Pecan Muffins

Here I go again with the healthy baking. I started a new job this week that I actually have to commute to. So my goal is going to be to bake some more wholesome snacks I can grab and go in the morning. And to start with we have oatmeal pecan muffins with some dried currants thrown in.

Muffin bite

While these are on the healthier side they're still made with a bunch of brown sugar (delicious) and while it's not butter, there's a lot of oil in there... But definitely make them! They're yummy! Here it goes:

Oatmeal Pecan Muffins
Adapted from Divine Baking
Yields around 1 1/2 dozen regular size muffins

2 cups flour
1 cup oatmeal
1 tablespoon baking powder
1/2 teaspoon baking soda
1/2 teaspoon salt
1 cup brown sugar
1 teaspoon cinnamon
1/4 teaspoon ground cloves
2 eggs
1/2 cup oil
1 1/2 cups yogurt
1 teaspoon vanilla extract
1/2 cup chopped pecans
1/2 cup dried currants (or raisins, or other dried fruit. or optional!)
  1. Preheat oven to 350 degrees and line muffin pan with papers. Or, coat the muffin pan with cooking spray, your choice.
  2. Mix together flour, oatmeal, baking powder, baking soda, salt, brown sugar, cinnamon and ground cloves in a large bowl and set aside.
  3. In a mixer combine eggs, oil, yogurt and vanilla. Slowly mix in dry ingredients.
  4. Stir in pecans and currants.
  5. Spoon into lined or unlined muffin pan. Bake for 20 minutes.
  6. Cool in pan on wire rack before turning out.
  7. Store in air tight container at room temperature.
Oatmeal pecan muffins

Monday, March 21, 2011

Homemade Granola Adventure

While baking things like chocolate Irish whiskey ice cream cupcakes is probably more fun, these homemade granola bars are undeniably tasty, easy to make and good for you!

These recipe for these bars can be found here. I really liked the almond butter in them, and while it took a bit to get used to the idea of keeping my granola bars in the fridge, they were still chewy which made me happy. I also liked the crunch the rice cereal added. :o)

Homemade granola bars

But to each their own, Dave didn't want to keep them in the fridge, and said the rice cereal reminded him too much of a rice krispie treat and he doesn't like to mix his snacks.

So give you...

Dave's Keeps-Out-Of-The-Fridge Homemade Granola
Adapted from Cookie Baker Lynn
(Note: This version didn't do so well as bars, keep it crumbly and eat with a spoon like cereal!)

1 cup old-fashioned rolled oats
1/4 cup slivered almonds
1/4 cup sunflower seeds
1 tablespoon flaxseeds, preferably golden
1 tablespoon sesame seeds
1 cup crushed graham cracker crumbs (I used honey graham but certainly your own favorite would do!)
1 cup assorted dried fruits (This version and the version pictured above used dried apricots diced up, currants, and sweet cherries)
1/4 cup molasses
1/4 cup honey
1/2 teaspoon vanilla extract
1/8 teaspoon salt

  1. Preheat oven to 350°F.
  2. Spread oats, almonds, sunflower seeds, flaxseeds and sesame seeds on a large baking sheet. Bake until the oats are lightly toasted and the nuts are fragrant for about 8 - 10 minutes. Stir once half way through. Transfer to a large bowl.
  3. Add graham cracker crumbs and dried fruit. Give it a stir.
  4. Combine molasses, honey, vanilla and salt in a small saucepan. Heat slowly and stir continuously only until pourable.
  5. Immediately pour the molasses/honey mixture over the dry ingredients and mix with a spoon or spatula until no dry spots remain.
  6. Refrigerate until it firms up then keep in an air tight container at room temperature.

Sunday, March 20, 2011

Chocolate Chip Eats Oreo

I made these a week or two ago as dessert for Sunday night dinner with my family. But I thought they would make a lovely Spring Equinox post since I used special springtime Oreos...

Okay, I didn't really seek out special springtime Oreos. They were on the end of the aisle. They're the springtime edition because they have yellow cream in the middle, and apparently 5 different special springtime designs on the cookies. Not that you can tell for these, because they are consumed by a chocolate chip cookie! :oD

Chocolate chip eats oreo

Recipe can be found here. The bake time was more like 15 - 17 min for me, but my cookies were ginormous, hehe... Here is an unflattering picture of me showing you how one of the cookies is the size of my face!

Cookie is the size of my face! Yikes!

They were easily a one person dessert in themselves. Plus a scoop of ice cream on top. If you make them, I suggest you leave plenty of room on the cookie sheet for them to spread out!

There are more in the Cookie Adventures set on Flickr!

Wednesday, March 16, 2011

Irish Soda Bread - Traditional?

Funny that I now have two St. Patrick's Day posts! St. Patrick's Day was never my thing, and I can't explain why but perhaps baking is making me expand my thinking!

On to the soda bread!

Irish soda bread for St. Patricks Day

So I saw friends posts on Facebook about baking up Irish soda bread for St. Patrick's Day, and I remembered in grade school we would always have St. Patrick's Day parties the our teacher would always say, "Class, so and so's mom baked us this special Irish soda bread in honor of St. Patrick's Day!" And I thought it would be really special and tasty and cool, and it NEVER was! I was terribly underwhelmed...plus it always has raisins and I hate raisins (they're just rotten grapes).

So it got me thinking what was in that stuff anyway? I don't remember much about it except a big hype then a let down. So I googled the traditional, "right" way to make it, and was happy to find out 1) it's super simple and 2) it's not supposed to have raisins in it! If it does, it's not Irish soda bread. Aha! So I was off and running to make it "the right way."

I found a wealth of information here at the Society for the Preservation of Irish Soda Bread's website. Yet I used this recipe which I deemed traditional but was also speaking more of my language in ease of understanding the recipe.

Traditional Irish Soda Bread
As found on Food.com by
Halcyon Eve

Yields 1 loaf

4 cups all-purpose flour
1 teaspoon baking soda
1 teaspoon salt
1 -1 1/2 cup buttermilk (I substituted 1 cup regular milk mixed with 1 tablespoon lemon juice)
  1. Heat oven to 425 degrees F. Brush a baking sheet with melted butter or spray with non-stick spray. (I just lined with parchment)
  2. Combine dry ingredients in a deep bowl. Gradually stir in 1 cup buttermilk, beating constantly, until dough is firm enough to be gathered into a ball. If dough crumbles, add up to 1/2 cup more buttermilk, 1 tbsp at a time, until it holds together.
  3. Place on a lightly floured board and pat into an 8-inch flattened round loaf.
  4. Place loaf on baking sheet and slash a 1/2-inch deep "X" into the top of the dough with a small, sharp knife.
  5. Bake at 425 degrees F for about 45 minutes, or until the top is golden.
And here's what I got!

My first Irish soda bread

I think it was semi-successful? I need to borrow someone's Irish grandmother to help me out... I only used 1 cup of the buttermilk and it was crumbly but held together...so I didn't add more. Plus I expected the crust to be super tough...but this was a match for my knife...not to mention my teeth. It's not super thick so it's edible, but be careful! The inside is chewy and a good consistency I think, but again, how do I know? Was it too dry? Should I have added more buttermilk? All good questions...

Sliced Irish soda bread

I'll try this again in the St. Patrick's Day "off season" I think since I LOVE bread in general and it was so easy to make. I'd like to use some different flours as detailed here and try out some tricks for a friendlier crust.

Happy St. Patrick's Day baking! :oD

Tuesday, March 15, 2011

Chocolate Irish Whiskey Ice Cream Cupcakes

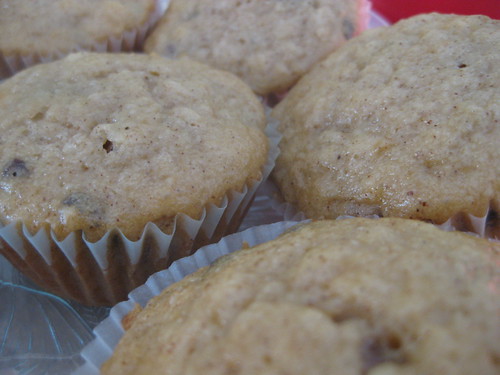
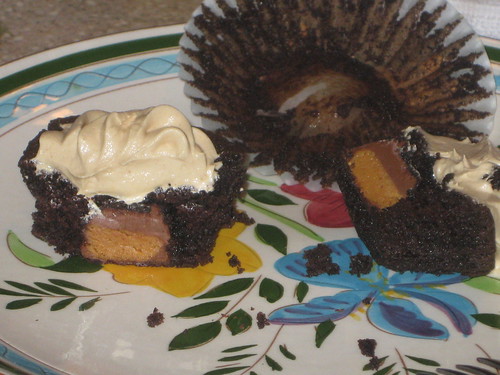
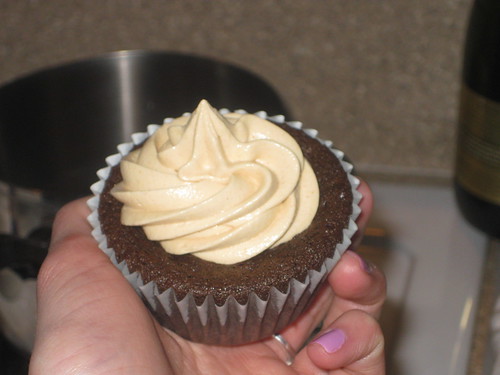
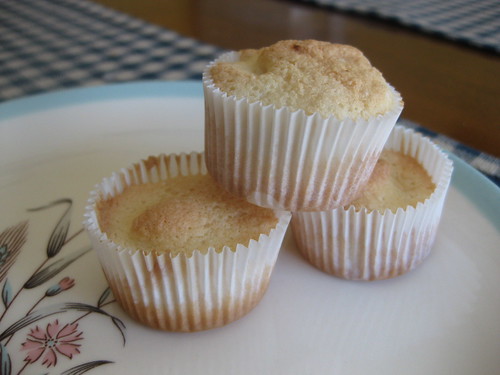
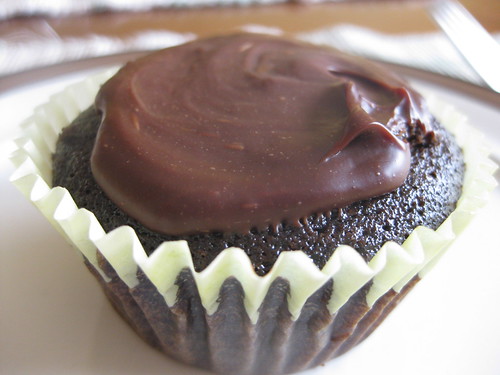
This is the St. Patrick's Day treat post! Chocolate Irish whiskey cupcakes, filled with chocolate ice cream and topped with chocolate Bailey's Irish cream glaze. So good.

Chocolate irish whiskey cupcake, filled with chocolate ice cream, topped with irish cream glaze

Chocolate Irish Whiskey Ice Cream Cupcakes with Baileys Chocolate Glaze
Adapted from Sprinkle Bakes and 500 Cupcakes
Yields approx. 2 1/2 dozen regular size cupcakes

For the cupcakes:
2 cups all purpose flour
1 1/4 teaspoon baking soda
1/2 teaspoon salt
1 1/2 cups strongly brewed coffee (I used two packets of Starbucks Via in the 1 1/2 cup water)
1/2 cup Irish whiskey (Jameson, of course)
1 cup unsalted butter, cut into pieces
1/2 teaspoon cinnamon
1 cup unsweetened cocoa powder
2 cups sugar
2 eggs
1 teaspoon vanilla extract
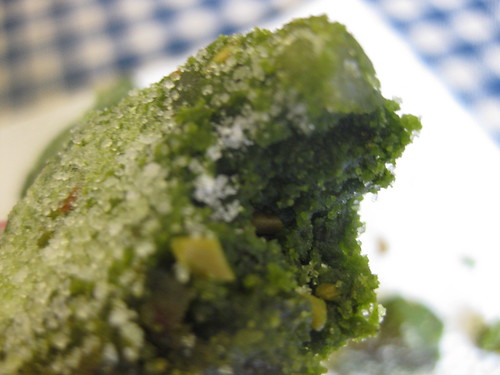
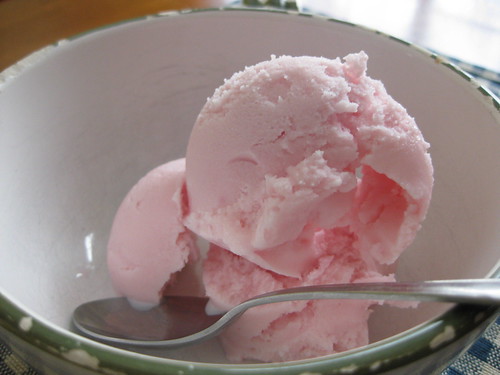
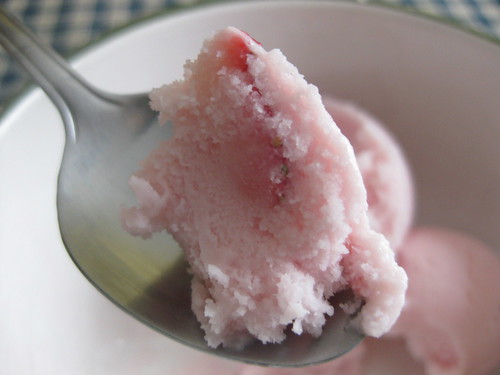
Chocolate ice cream (I suggest Breyers)
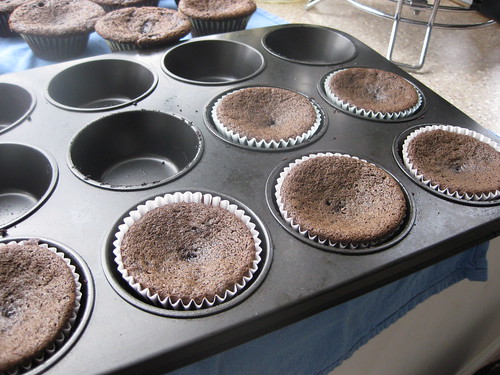
  1. Preheat oven to 325. Line regular size cupcake pan with wrappers.
  2. Whisk together flour, baking soda and salt and set aside.
  3. In a medium saucepan combine butter, coffee, whiskey, cinnamon, and cocoa powder over low/medium heat until melted. Whisking until smooth.
  4. Remove from heat and whisk in the sugar. Allow to cool slightly.
  5. In a mixer, mix together the eggs and vanilla.
  6. Slowly pour in the chocolate mixture.
  7. Add flour mixture and whisk until just combined. Mixture will be very thin.
  8. Pour into prepared cupcake pan until cups are around 2/3 full
  9. Bake 15 - 17 until cake springs back when touched and cake tester inserted in the center of the cupcakes comes out almost clean.
  10. Set on wire rack in pan to cool for 5 - 10 min.
  11. Remove from pan and leave on wire rack to cool completely.
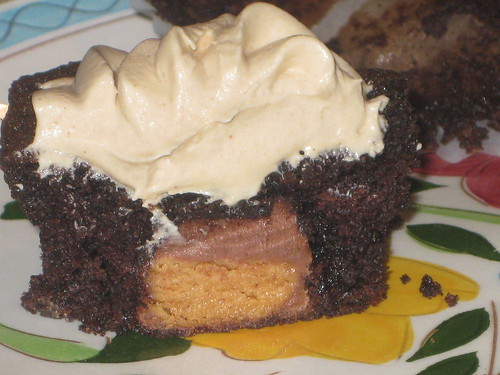
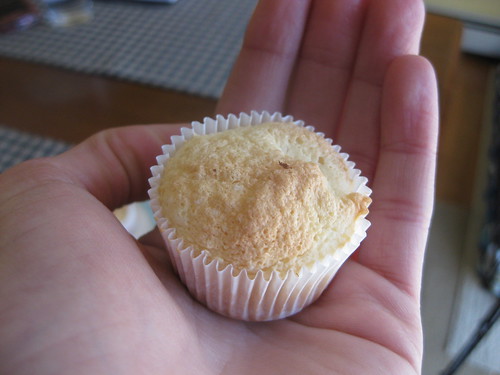
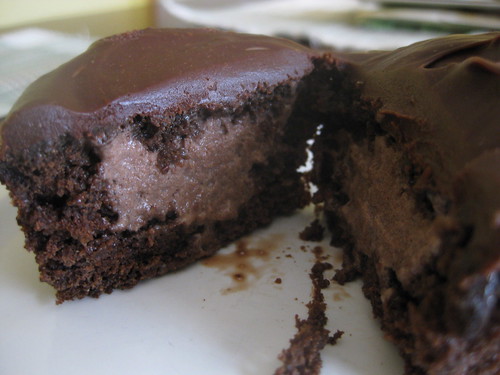
Fill with ice cream!
A good photo tutorial can be found here where I used the same method making Boston cream cupcakes!
  1. Once cooled to room temperature completely, put the cupcakes into the fridge for about 20 min or so. Meanwhile take the ice cream out of the freezer and let it soften slightly.
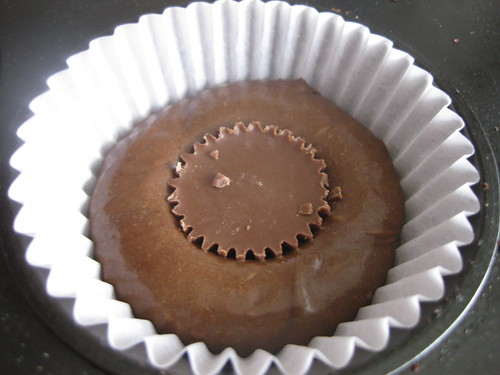
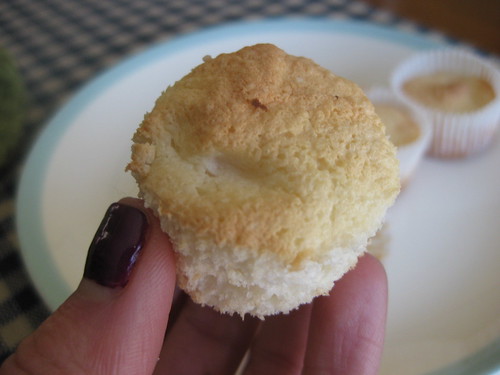
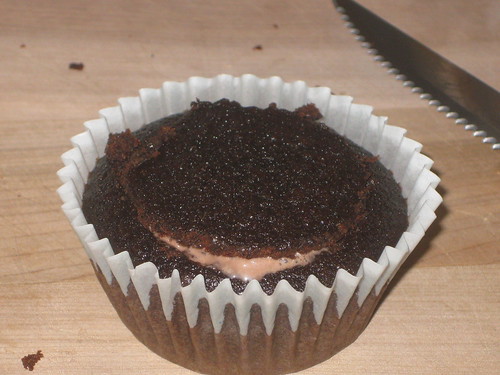
  2. Remove the cupcakes from the fridge (they'll be easier to work with when they're cold) and use a knife to remove the center of each cupcake and cut the bottom portion of the "cone" off, keeping the "hat" of the cupcake intact.
  3. Eat the cupcake cake insides you just removed! :oD mmmm...whiskey chocolate cake...
  4. Spoon a bit of the softened chocolate ice cream into the center of the cupcake and replace the cupcake hat
  5. Place cupcakes into the freezer until ice cream refreezes

    Filled with chocolate ice cream
For the Baileys chocolate glaze:
1 cup semi-sweet chocolate chips (Ghirardelli will do the trick, accessible and tasty)
1/2 cup heavy cream
3 tablespoons Baileys Irish cream
  1. Melt the chocolate in a double boiler over simmering water
  2. Remove from the heat and stir in the heavy cream
  3. Stir in the Baileys
  4. Allow to cool slightly
  5. Remove the cupcakes from the freezer and spoon the glaze over each cupcake. Pop em back in the freezer
Once the glaze is set, store them in an air tight container in the freezer for up to 3 months. Before serving, remove from freezer to fridge for about 20 - 30 min or so.

Chocolate irish whiskey cupcake in the wrapper

Happy St. Patrick's Day kids!

Sunday, March 13, 2011

Baking Party - Chocolate Peanut Butter Cupcakes

Sometimes I try to bake something different or trendy, or something the boyfriend will like. And he's not too into sweets so it's sort of a losing battle. But when I was invited to a baking party I wanted to make something I liked! That would also be a crowd pleaser as well. Chocolate with peanut butter or chocolate with mint topped the list, and chocolate peanut butter won.

I have a few recipes bookmarked but really if I'm baking to suit my own tastes, this is the recipe I was going to go for.

Chocolate cupcake with Reeses peanut butter cup inside & peanut butter frosting

I made it two thirds of the way there, we never made it to the chocolate shell, we just ate them. If I was baking at home I would have, so this one will reappear one day. But there was so much food already!

These are chocolate cupcakes with a Reeses peanut butter cup baked inside, topped with peanut butter buttercream frosting. This frosting makes you want to die. It was the most incredible, indulgent cupcake ever. And I'm all about serious desserts, and even I think this was intense.

Here's the story via photos:

Chocolate peanut butter cupcake pre-bake

Naked chocolate peanut butter cupcakes

Amazing peanut butter frosting

Holy chocolate peanut butter...

Yum!

These chocolate peanut butter cupcakes also just joined Sweet as Sugar Cookies' Lisa at her sweet treat link party, btw. Lots more over this way!

Friday, March 11, 2011

Matcha Cookies with Candied Ginger and Toasted Almonds

I love tea. I drink lots of it, and all different kinds. The last time I stopped into Teavana I was surprised to see they had matcha powder. I'd been waiting for Dave to get back to the Asian supermarket to pick some up, but here it was, and I was there, so I got it.

I have plans for green tea ice cream, but in revisiting one of my Martha Stewart cookie books, I rediscovered a recipe for matcha tea biscuits and had to make them promptly.

Sugar coated green tea cookie

They came out delicious although not as perfect as Martha's. There are quite a few steps to making them, aside from toasting the almonds, chopping the candied ginger, etc. You have to take them out of the oven, slice them, sprinkle with sugar, put em back in the oven, take out, sprinkle, etc. It is Martha after all...

They were a little crumbley to slice and I would totally double the recipe next time to make more!

Plus they need more ginger somehow. I'm considering candying my own ginger to get ginger to sugar to sprinkle them with.

But they definitely tasted like sugar coated green tea deliciousness!

Green tea cookie with candied ginger and toasted almonds

Thursday, March 10, 2011

Mini Maple Angelfood Cupcakes

These are like little maple clouds from heaven.

So tiny! maple angelfood cake

They weren't for an occasion, I just made them randomly one night. They also call for maple glaze, which I didn't make. But you definitely should, it will lend to the mapleyness of them.

In all the baking blogs I read, and shows I watch, and this current cupcake craze that has taken over, I can't say I've ever seen an angelfood cupcake. Well I googled it and of course I'm not the first to think of it. So good! It can be done, here's the recipe!

And here are my findings:
  1. Cake flour doesn't exist. Do I really need to order it? And why use it when you can just use 1 cup of all purpose flour minus 2 tablespoons (1c – 2tbsp)? Turned out great.
  2. USE CUPCAKE WRAPPERS. This is not the first time this has happened to me baking cupcakes without wrappers. Although the cake is baked perfectly on the inside, it's the the pan singes the cake outside and it gets burnt. :o( These photos are from the minis with wrappers that worked out perfectly.
  3. Minis only needed 11 min to bake!
  4. Make the maple glaze. Delicious and sweet with a hint of maple, but if I didn't tell you it was in there, you might not know.
  5. If you're too lazy to cover them and wrap them and just put them in a big baking dish and put them back in the oven, tell the boyfriend if he takes them out to use the oven, the oven has to cool before he can put them back in there. :o/ My own fault...

Mini maple angelfood trio

The cuteness factor is a lot of the appeal here, but you need to eat like 12 of them to feel satisfied. ;o) Here's one last perfect little bite of maple angel goodness.

Mini maple angelfood cupcake, unwrapped

Tuesday, March 8, 2011

Strawberry Frozen Yogurt - With or without an ice cream maker

In my baking excitement I never posted my sexy strawberry frozen yogurt.

Strawberry frozen yogurt success

Simple Strawberry Frozen Yogurt

1 2/3 cups milk
3/4 cup granulated sugar
4 cups strawberry yogurt
1/4 cup heavy cream
About 3/4 cup fresh strawberries, cut up into 1/2 - 1/4 inch pieces

  1. With a hand mixer, combine the milk and sugar until sugar is dissolved - be patient
  2. Stir in the yogurt and heavy cream
  3. Process in ice cream maker according to manufacturers instructions for 20 - 25 minutes. OR if you don't have an ice cream maker, you can try the process I describe at the bottom of this post.
  4. In the last 5 minutes of mixing, stir in the fresh strawberry pieces
  5. Frozen yogurt will have a soupy soft serve consistency, but transfer it to containers to finish freezing and it will be PERFECT!
Homemade strawberry frozen yogurt, with fresh strawberry pieces

It was definitely refreshing, I can't wait for sorbet season. The fresh strawberries were a nice touch (pat self on back), plus they look sexy.

So I know when I came across any ice cream recipe that said "process in your ice cream maker" I immediately stopped reading. Which is pretty much all recipes... BUT if you have a lot of time on your hands, you can do it the slow and steady way. There weren't always ice cream makers you know!

How to make frozen goodies without an ice cream maker
  1. Make room in your freezer for a blender pitcher.
  2. When your recipe says to add it to your ice cream maker for processing, pour the whole thing into the blender and put it in the freezer for 40 min to an hour.
  3. Every 40 min to an hour, take it out and blend it for a few moments, then return it to the freezer.
  4. As it freezes, use a spoon to push the frozen parts off the side back into the blender and blend some more.
  5. Eventually, you'll have to transfer it to containers while you can still get it out of the blender. ;o)
  6. You can use a hand mixer to give it a good mix a few more turns after this

I did this with triple berry sorbet and it was magic. I think the recipe stated to do this process for the next 3 hours I gave up and went to bed and it was still fine! I had the same success with ginger ice cream, but I religiously processed that every 40 min to an hour since I worked from home at the time and, well, I could. :o)

If you don't have a blender either, you can do the same process with a big metal bowl (some sites recommend a baking dish of sorts, since shallow will be better) and a hand mixer. But the blender is just so much easier.

Happy ice cream making!
Related Posts with Thumbnails